
 Save
Save
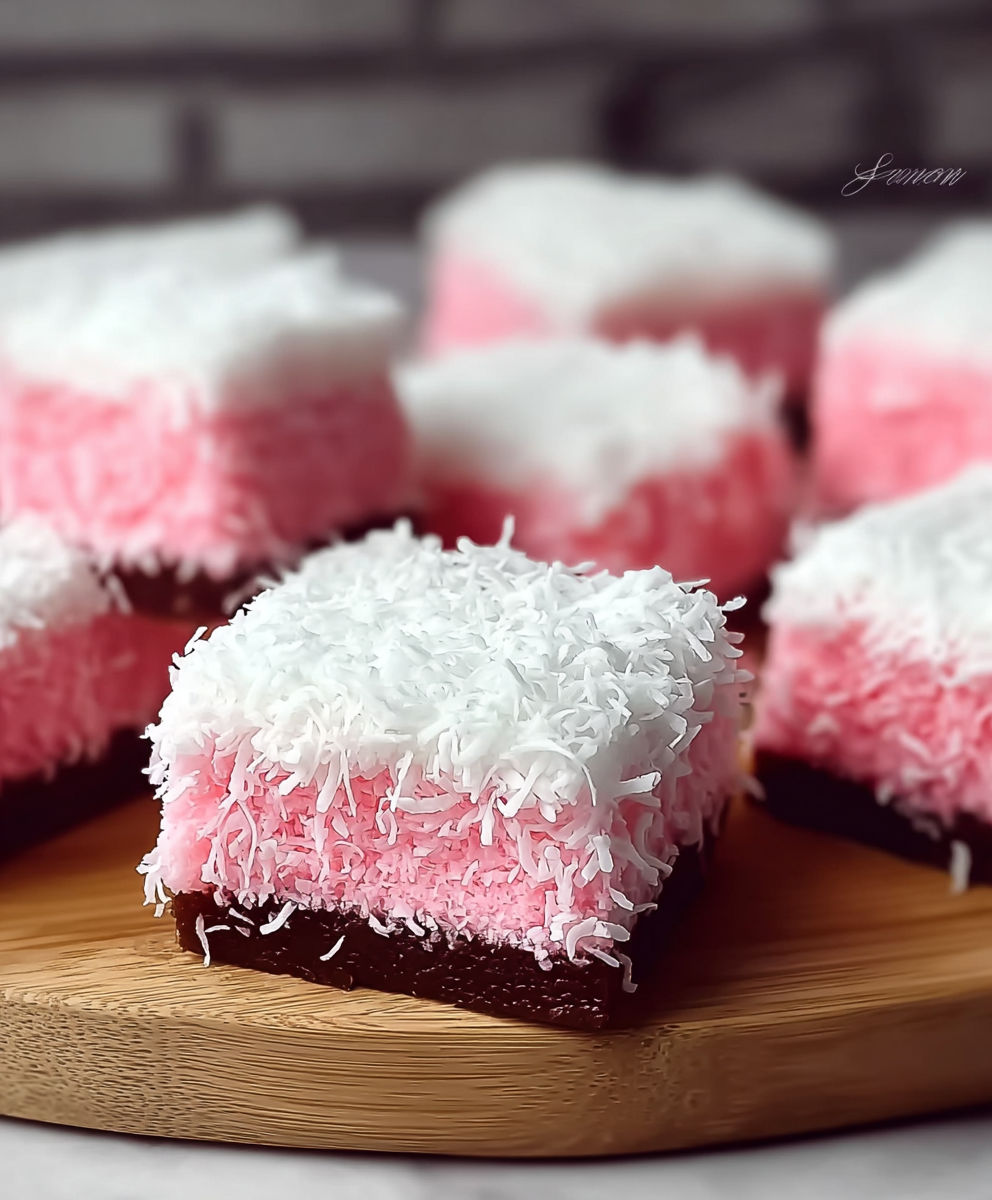
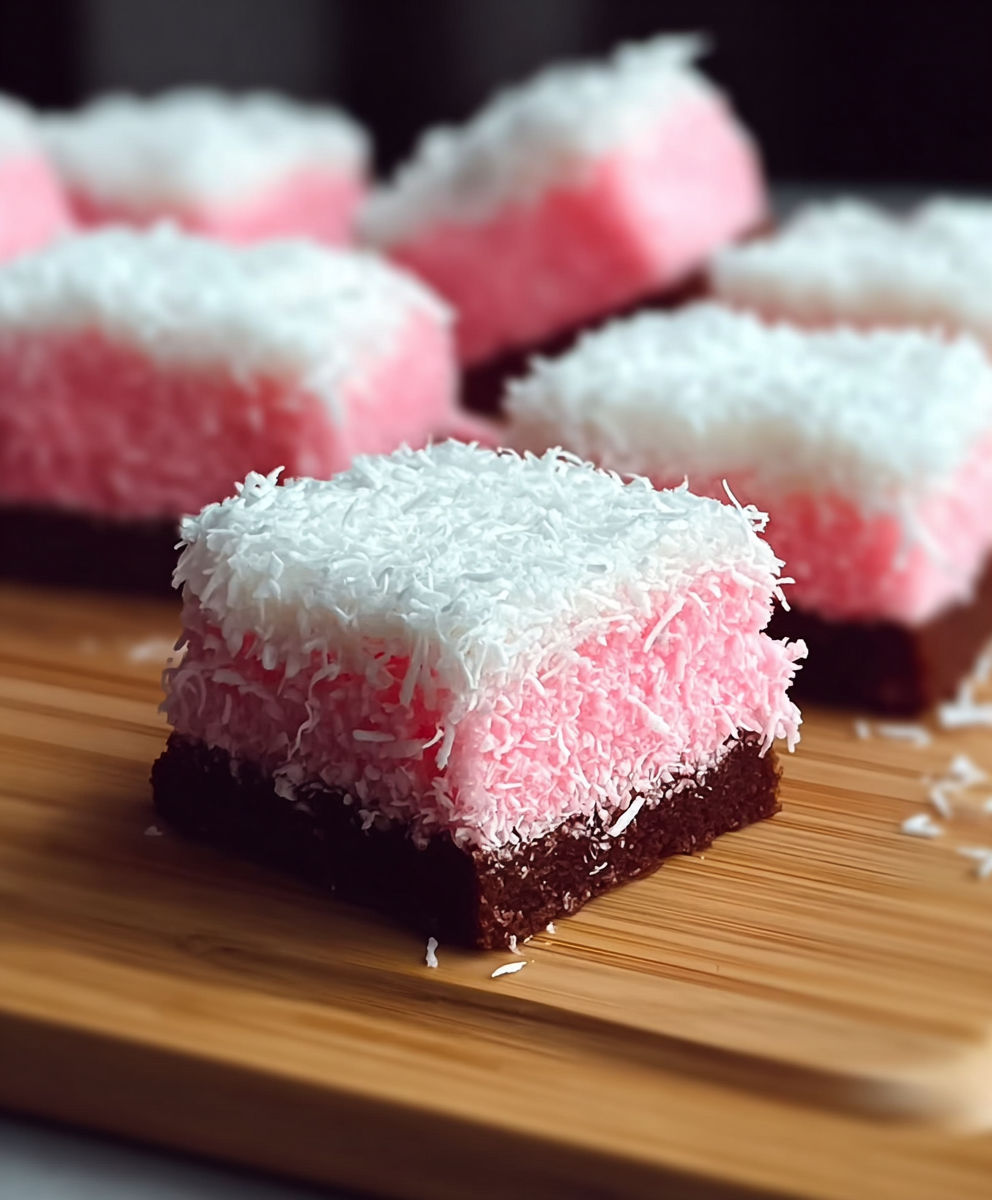
If you crave a playful dessert that pairs rich chocolate cake with fluffy whipped topping and a snowy blanket of pink coconut, these Pink Coconut Snowball Cake Bars completely deliver. Their vibrant color and irresistible textures are just as perfect for holidays and baby showers as for a sweet family treat on a chilly weekend.
My first batch turned out so well that my nieces now insist on this as their birthday celebration treat. They love helping sprinkle the coconut and cut out the pretty bars.
Ingredients
- All purpose flour: brings structure and keeps the cake light. Choose fresh flour for best results
- Cocoa powder: delivers deep chocolate flavor. Dutch processed or natural both work
- Baking powder and baking soda: are essential for rise. Always check freshness by testing a bit in water
- Salt: makes every flavor pop. Use fine sea salt for even seasoning
- Unsalted butter: keeps the crumb tender. Soften first for easy mixing
- Granulated sugar: adds sweetness and moisture. Choose a fresh bag to avoid hard lumps
- Eggs: provide richness and help the cake set. Large eggs give the right texture
- Vanilla extract: rounds out all the flavors. Pure extract makes a big difference in taste
- Buttermilk: offers tang and a soft crumb. Fat content helps moisture. If you do not have it, make a quick substitute by adding vinegar or lemon juice to milk
- Hot water: activates the cocoa and creates a smooth batter. Use freshly boiled water
- Heavy whipping cream: whips into a dreamy topping. Chill for best fluffiness
- Powdered sugar: sweetens the topping without graininess. Sift if lumpy
- Vanilla extract: enhances the topping
- Cream cheese: adds stability so the topping stays neat on the bars. Use softened for easy blending. This is optional but makes slicing easier
- Shredded coconut: provides both chew and festive snowball texture. Sweetened coconut is classic but unsweetened works for a less sugary version
- Pink food coloring: makes the coconut magical. Look for gel for the most vivid color
- Milk: loosens the coconut mixture if your color is not blending evenly. Whole milk or any variety is fine
Instructions
- Preheat the Oven:
- Set your oven to 175 degrees Celsius or 350 degrees Fahrenheit so it is fully hot when the batter is ready
- Prepare the Pan:
- Grease a nine by thirteen inch baking pan thoroughly and line it with parchment if desired. This ensures bars lift out smoothly after chilling
- Mix the Dry Ingredients:
- In a large bowl whisk together flour, cocoa powder, baking powder, baking soda, and salt. Make sure everything is evenly distributed to prevent lumps later
- Cream the Butter and Sugar:
- In a second bowl beat softened butter with sugar until the mixture is pale and fluffy. This takes about four minutes with a hand mixer and creates a tender base
- Add Eggs and Vanilla:
- Crack in the eggs one at a time, mixing well after each, then stir in the vanilla extract. This step builds the richness of your cake
- Incorporate Dry Ingredients and Buttermilk:
- Gently fold in the dry flour mixture, alternating with buttermilk. Begin and end with the dry mix to keep your batter light
- Add the Hot Water:
- Pour in the hot water slowly. Stir until the batter looks smooth and glossy. This step makes the cake moist and even
- Bake the Cake:
- Pour batter into the prepared pan. Smooth the top and bake for twenty five to thirty minutes. A toothpick should come out clean or with a few crumbs when done
- Cool Completely:
- Remove the cake from the oven and let it cool fully in the pan. This prevents melting the whipped layer
- Prepare the Whipped Topping:
- If using cream cheese beat it on its own until silky. Add cold heavy cream, powdered sugar and vanilla then whip with a mixer until fluffy and stiff enough to spread
- Spread the Whipped Layer:
- Evenly cover the cooled cake with the whipped topping. Use an offset spatula for a smooth finish
- Tint the Coconut:
- Place coconut in a bowl. Add a few drops of pink food coloring. Mix with a fork or hands to evenly coat every strand. For even color add a splash of milk to help distribute
- Finish with Pink Coconut:
- Sprinkle pink coconut evenly over whipped layer and gently press so it sticks and covers every spot
- Chill and Slice:
- Refrigerate the whole pan for at least an hour before slicing. Use a long knife to cut into squares for neat bars
- Serve and Enjoy:
- Enjoy bars chilled for the best flavor and texture. They make a beautiful addition to any dessert table
I absolutely love the color surprise when slicing into these bars. The pink coconut always reminds my family of winter snow but with a playful twist. My granddad used to sneak a bar or two before anyone else had a chance.
Storage Tips
Store any cut bars in an airtight container in the refrigerator and they will stay fresh for up to four days. For an extra chilled treat serve straight from the fridge. If you want to freeze them, wrap bars individually in plastic wrap and then place in a zip top bag. Thaw overnight in the fridge to keep the texture soft and creamy.
Ingredient Substitutions
You can swap buttermilk for regular milk mixed with a teaspoon of vinegar. If you are out of cream cheese simply use more whipped cream. No pink food coloring Just leave the coconut white for a snowy effect or stir in a natural beet juice for blush tones.
Serving Suggestions
Try serving these bars with hot chocolate on a cold day. They make a whimsical addition to any holiday cookie platter. Cut into triangles or small bites for festive baby showers or birthdays.
Cultural and Historical Context
These bars have roots in classic Australian and British lamingtons which cover cake with coconut. The pink version brings a retro party feel that was especially popular in mid century American kitchens. Many old fashioned recipes inspired this updated version but I love how the fresh cocoa cake and creamy topping make it completely modern.
Seasonal Adaptations
Use blue or green food coloring for themed birthday parties. Try toasting the coconut lightly for a warmer nutty flavor in autumn or winter. In spring garnish with flower petals or edible glitter for a whimsical touch.
Success Stories
Every time I bring this to teacher appreciation lunches there are never leftovers. The coconut topping has won over even my coconut skeptic friends.
Freezer Meal Conversion
For make ahead freezer treats, slice after chilling and wrap each bar. Flick with a bit more pink coconut after thawing to refresh the look.
Serve these bars at your next celebration and watch everyone smile. The cloud light topping and pink coconut will always delight your guests.
Recipe FAQs
- → What type of coconut works best?
You can use either sweetened or unsweetened shredded coconut based on your preference. Sweetened adds extra moisture and enhanced sweetness, while unsweetened gives a lighter, more natural flavor.
- → How do I get the coconut evenly pink?
Add small drops of pink food coloring and gently stir the coconut in a bowl, adding a splash of milk to help distribute the color smoothly.
- → Can I make these bars ahead of time?
Yes, you can prepare them a day in advance and keep covered in the refrigerator for optimal freshness and clean slicing.
- → Is the cream cheese layer necessary?
Cream cheese adds stability and a silky texture to the cream, but you may leave it out if desired for a lighter, more whipped texture.
- → How do I store leftover bars?
Keep bars refrigerated in an airtight container. Enjoy within 3 days for best quality and texture.