
 Save
Save
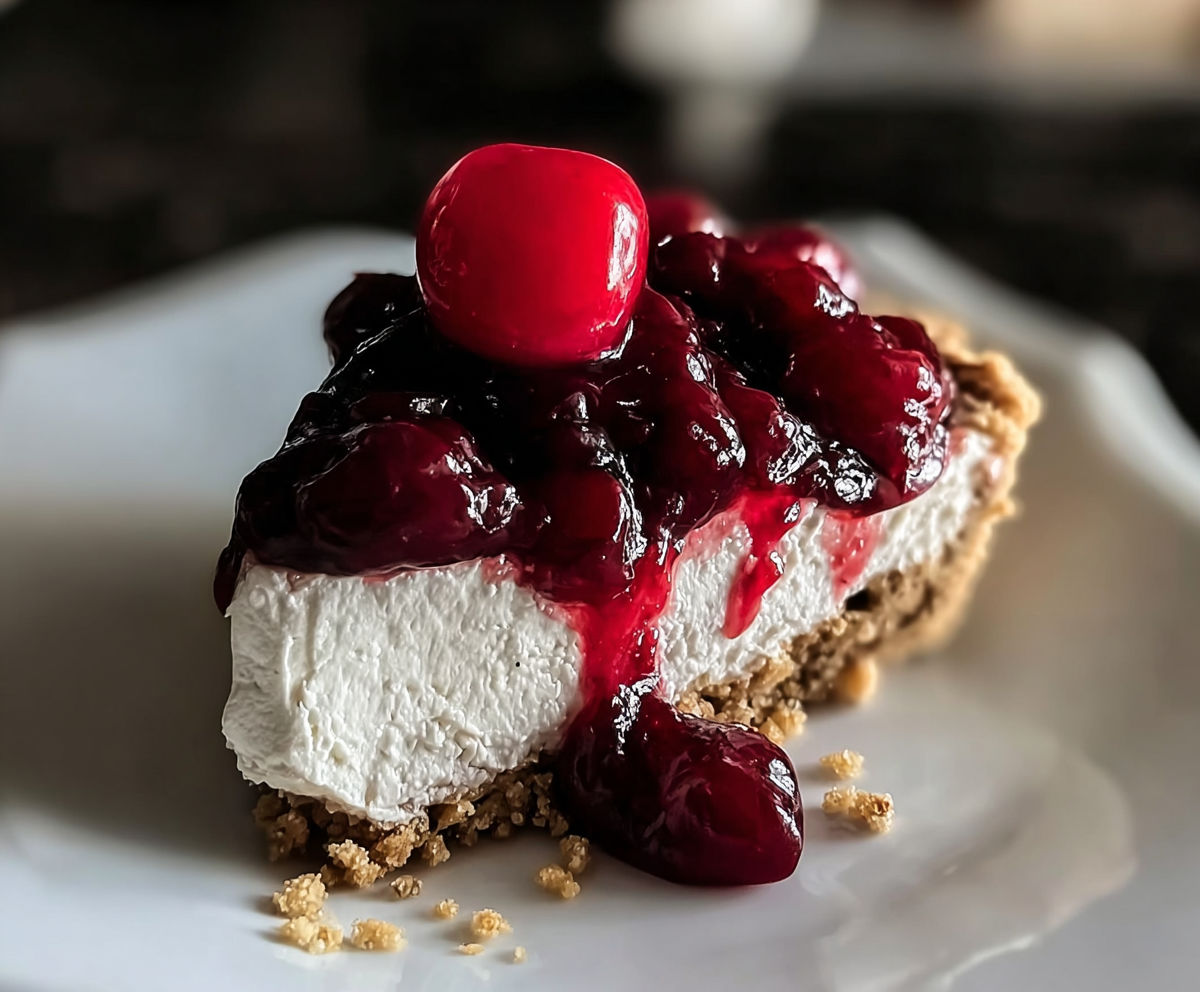
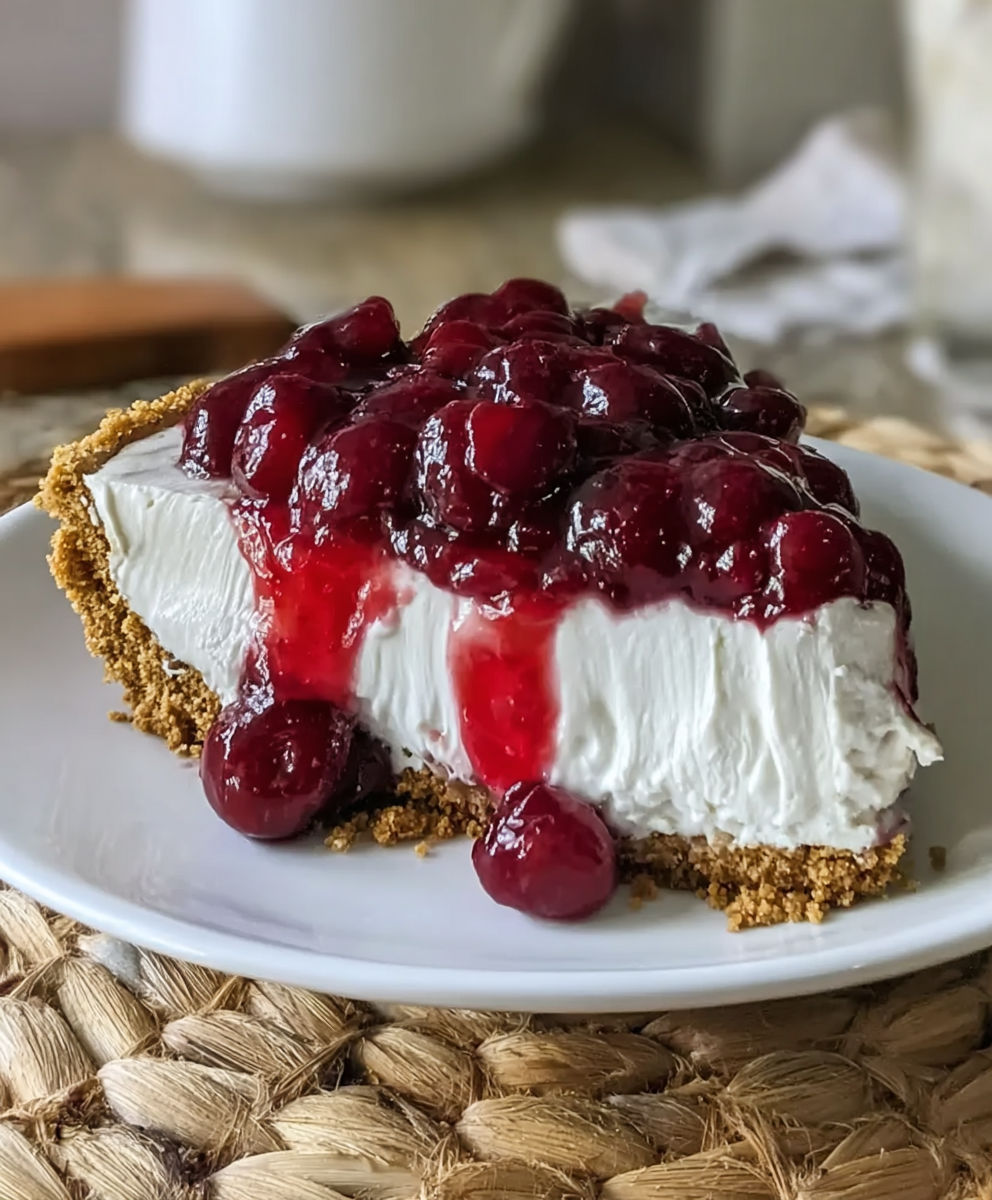
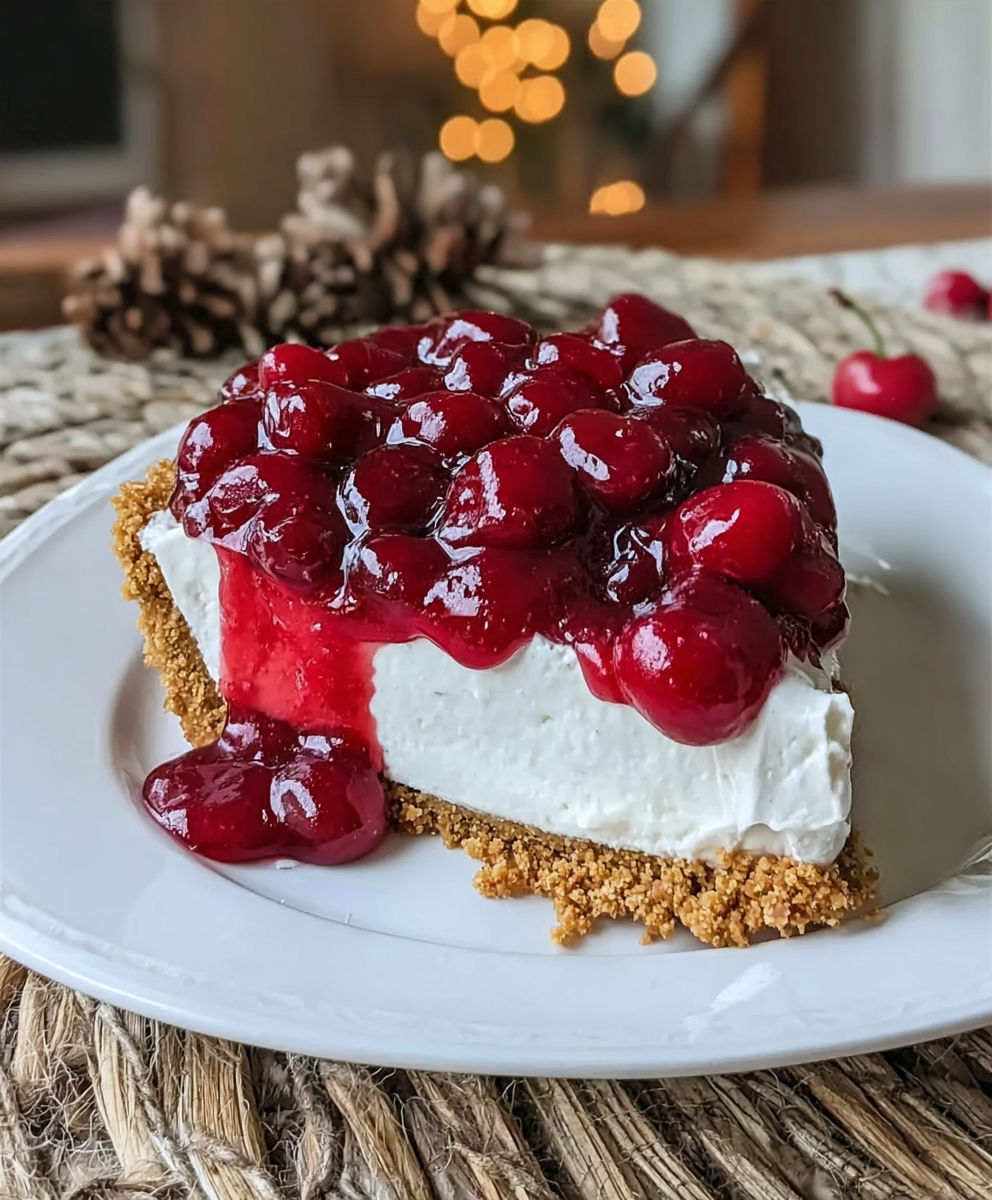
No-bake cherry cheesecake is my answer for easy celebrations or backyard barbecues when I want dessert to feel special without turning on the oven. In just a few easy steps, you get a creamy cheesecake crowned with a glossy cherry topping everyone will ask about. This recipe is about simple pleasures and the surprisingly impressive results you get from a handful of familiar ingredients.
When I first tried this for a potluck I worried it would be too simple next to fancier desserts but it was the first dish gone. Now I purposely plan to make it a day ahead so I can enjoy the way the flavors deepen overnight.
Ingredients
- Graham cracker crust: gives that classic crunch and toasty flavor for the perfect cheesecake base. Choose crackers with a good golden color for the best taste.
- Cream cheese: softened at room temperature for that smooth and creamy filling. Always check the ingredient list and pick one with minimal additives for the richest flavor.
- Granulated sugar: adds sweetness and structure. Fine grain sugar dissolves best and leaves the filling velvety.
- Whipped topping: adds cloud-like lightness to the filling. Choose a brand you trust and keep it chilled until ready to use.
- Cherry pie filling: the unmistakable sweet-tart fruity finish on top. Try to peek at the label for plenty of whole cherries to make your cheesecake look extra special.
Instructions
- Beat the Filling:
- Start by placing your softened cream cheese and granulated sugar in a large mixing bowl. Use an electric hand mixer or stand mixer and beat on medium speed for at least two minutes. Scrape down the sides often and keep mixing until all lumps are gone and the filling is completely smooth. This step sets the whole tone for the dessert so take your time.
- Fold in Whipped Topping:
- Once the base is creamy, switch to a spatula and gently fold in the whipped topping. Move in slow, broad strokes to keep the mixture airy. You want to see a uniform color with no streaks but do not overmix or the filling may deflate.
- Fill the Crust:
- Metal or glass pie pans work best for setting the crust. Pour the cream cheese mixture into the ready graham cracker crust. Use the back of a spoon or an offset spatula to level the surface all the way to the edges so you get a nice even layer.
- Add the Cherry Topping:
- Open the cherry pie filling and carefully spoon it over the cream cheese layer. Start in the center and work outward. Gently spread to cover the entire top. Avoid pressing down or mixing the layers. Each bite should have clear fruit and creamy filling.
- Chill and Set:
- Cover the cheesecake lightly with plastic wrap and transfer to the refrigerator. Let it chill for at least two hours. Overnight is even better for firm slices and a vibrant flavor.
Cherry pie filling has always been my favorite part as a kid I got to decorate the top and now my daughter claims that job. Every time we make it together we try to see who can arrange the cherries most artfully.
Storage Tips
Keep any leftover cheesecake covered in the refrigerator. It will taste great for up to three days after making. For best texture and appearance use within the first two days as the topping may start to get watery after that. If you plan to transport it use a pie carrier or secure with wrap.
Ingredient Substitutions
If you need a gluten free version simply swap in gluten free graham crackers and check your whipped topping brand for cross contamination. For a lighter dessert use reduced fat cream cheese and sugar free whipped topping but do not skip the chilling step as these swaps can make the filling softer. You can use homemade cherry compote for a fresher fruit flavor.
Serving Suggestions
Serve chilled straight from the fridge for clean slices. Run a sharp knife under hot water and wipe clean after each cut. For a fancy finish add a sprinkle of lemon zest or a little flaked sea salt just before serving. This cheesecake pairs perfectly with hot coffee or a glass of Moscato.
Cultural and Historical Context
No bake cheesecakes became popular in the US in the mid twentieth century as home cooks wanted easier desserts with the convenience of canned fillings and whipped toppings. While purists might argue the merits of baked versus no bake cheesecakes generations of families have relied on recipes like this one for reliable results and happy memories.
Seasonal Adaptations
This cheesecake is a blank canvas for seasonal fruit toppings. Consider swapping in spiced apple or pumpkin butter in cooler months. In spring try a topping of strawberries macerated with a little sugar.
Success Stories
I have used this dessert to win over skeptical coworkers and it quickly became a hit at family reunions. One friend added a swirl of melted chocolate before the cherry topping and declared it the best cheesecake hack. Next on my list is trying it with fresh peaches in the summer.
Freezer Meal Conversion
While this cheesecake does best in the fridge if you must you can freeze leftovers. Wrap tightly in plastic and then aluminum foil. Freeze for up to one month. Thaw overnight in the fridge before serving though the texture may lose some creaminess.
Nothing beats how easy this recipe is to share and modify. I have stories of neighbors stopping by for an impromptu taste and leaving with a to go slice. It is always the simple desserts that bring people together.
Recipe FAQs
- → How do I avoid lumps in the filling?
Make sure the cream cheese is fully softened to room temperature before blending with sugar. This ensures a smooth texture.
- → Can I use a different crust base?
Absolutely! Swap graham crackers for chocolate wafers, digestive biscuits, or use a gluten-free option for variations.
- → How long should the cheesecake chill for best results?
Chilling for at least 2 hours is necessary, but overnight refrigeration enhances firmness and flavor.
- → Is it possible to make this dessert ahead of time?
Yes, preparing a day in advance allows flavors to meld beautifully and the texture to set perfectly.
- → Can I use homemade cherry topping?
Yes, substitute canned cherry pie filling with homemade cherry sauce for a fresher, personalized touch.