
 Save
Save
These homemade hot dog buns are the ultimate upgrade for your grill outs soft fluffy and sturdy enough to hold all your favorite toppings They are far better than anything you will find at the store and the rich flavor makes every hot dog memorable There is something so satisfying about shaping and baking these buns from scratch and once you try them you will never go back to pre packaged
I first made these for a neighborhood cookout and was stunned when there were more compliments on the buns than the hot dogs themselves My family asks for them every summer
Ingredients
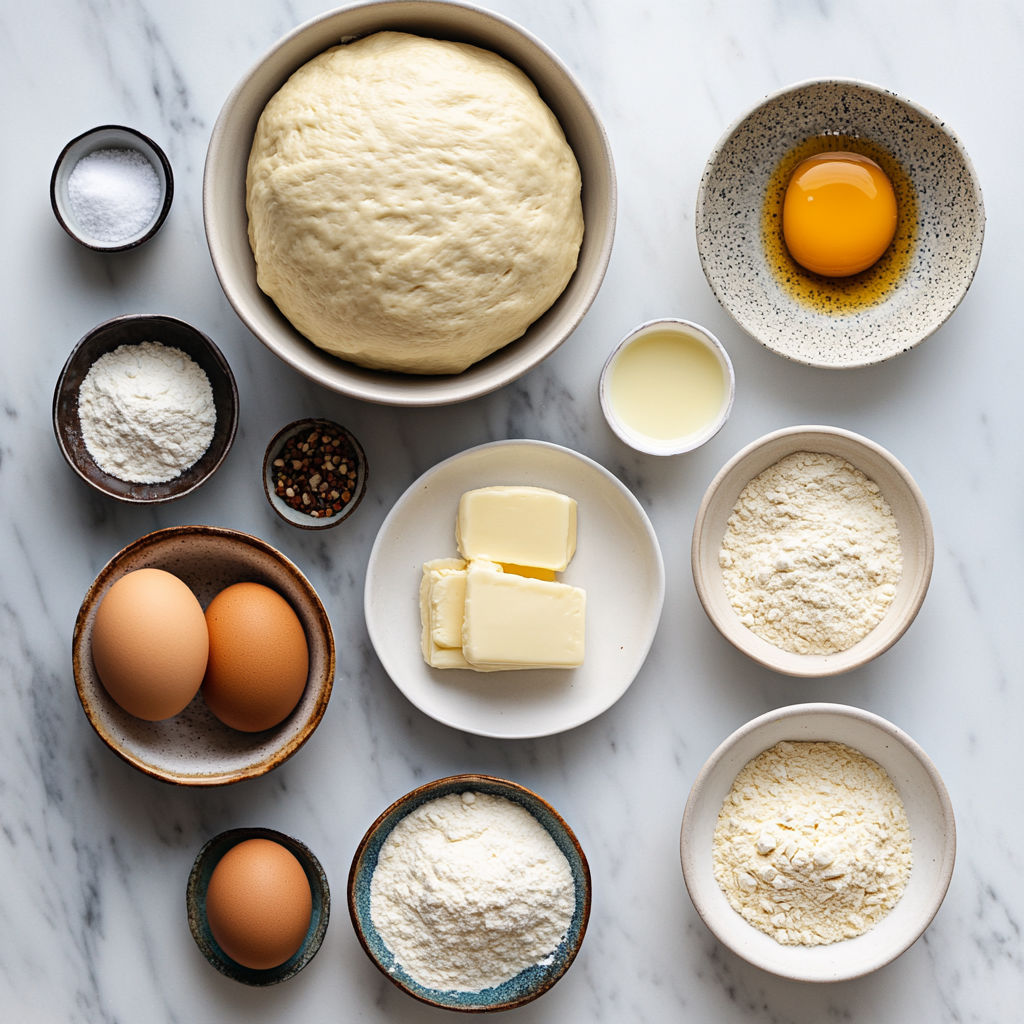
- Active dry yeast: gives your buns their signature rise use fresh yeast for reliable results
- All purpose flour: forms the base go for a high quality flour like King Arthur for best texture
- Sea salt: balances flavor and makes the dough more interesting than regular table salt
- Eggs: make the dough rich and create that golden finish opt for organic eggs if possible
- Unsalted butter: brings softness and flavor allow it to come to room temperature for the best blend
- Whole milk: provides extra tenderness and depth but you can use 2 percent in a pinch
- Sugar: feeds the yeast and gives you that faintly sweet classic bun profile
- Warm water: helps your yeast activate and allows the dough to come together easily
- Neutral oil: like canola or vegetable will keep the dough from sticking during rising and adds a hint of moisture
- Parchment paper: helps prevent sticking and ensures even baking so your buns stay picture perfect
Instructions
- Prepare the Dry and Wet Ingredients:
- Measure your all purpose flour sea salt active dry yeast and sugar directly into the bowl of your stand mixer Use clean accurate scoops for the flour A fresh packet of yeast will give you the best rise In a separate bowl combine warm milk warm water and one egg and whisk thoroughly so that everything is well blended The milk and water should be warm to the touch not hot Pour the wet mix into the dry ingredients slowly and use the paddle attachment or dough whisk to mix on low Combine until you have no dry spots left and the dough has just come together
- Knead the Dough Until Smooth:
- Switch to the dough hook and set your mixer to medium Knead until the dough is glossy and elastic and easily clears the sides of the bowl Expect the dough to feel soft and a little sticky which makes for very tender buns After about 5 minutes add the softened butter one tablespoon at a time Let the mixer work this in for another 8 minutes until the dough is supple and slightly tacky but no longer sticky
- First Rise for Maximum Flavor:
- Lightly grease a large mixing bowl with oil Place the dough gently inside then turn it so all sides are coated Cover with plastic wrap or a clean kitchen towel For the deepest flavor let the dough rest in the refrigerator overnight for up to twenty four hours If you need buns the same day let the bowl sit in a warm spot for about one hour until doubled
- Shape the Dough into Rolls:
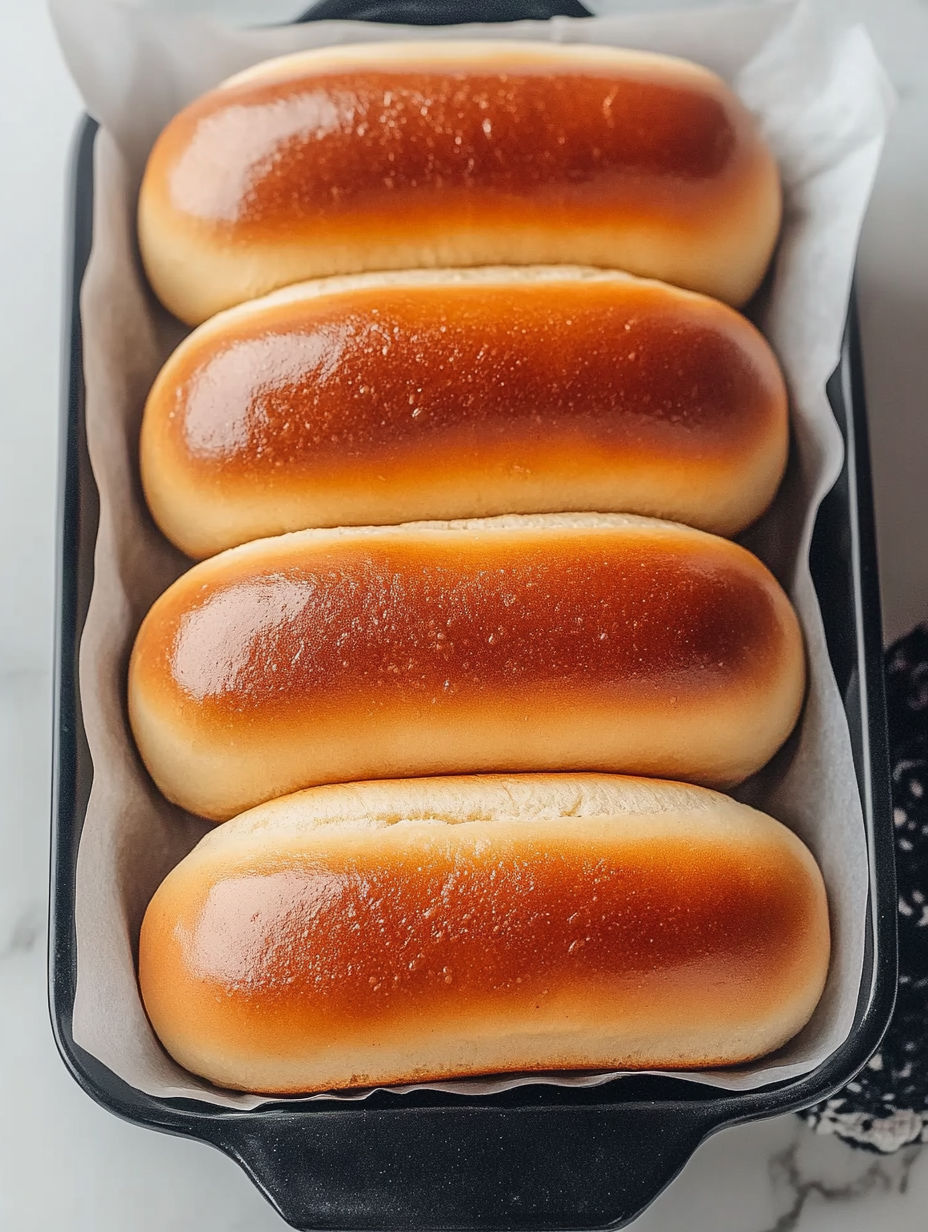
- Turn out your chilled or rested dough onto a lightly floured surface Gently press the dough into a rectangle about sixteen inches long and five inches wide Use a sharp knife or bench scraper to divide the dough into eight to ten even pieces Each piece becomes a bun Gently knead each into a ball then flatten and shape them into rectangles about five inches long Roll from the short end to create a cylinder shape Pinch the seams to seal the edges and gently tuck the sides under While rolling keep the surface taut for a smooth bun Place each formed bun on a parchment lined baking tray with about two inches of space between for spreading
- Second Rise and Oven Preparation:
- Cover shaped buns with a clean towel or plastic wrap and let them rise for forty five minutes Watch for them to puff up and nearly double in size Meanwhile preheat your oven to three hundred fifty degrees Fahrenheit so it is fully heated when buns are ready
- Apply Egg Wash and Bake:
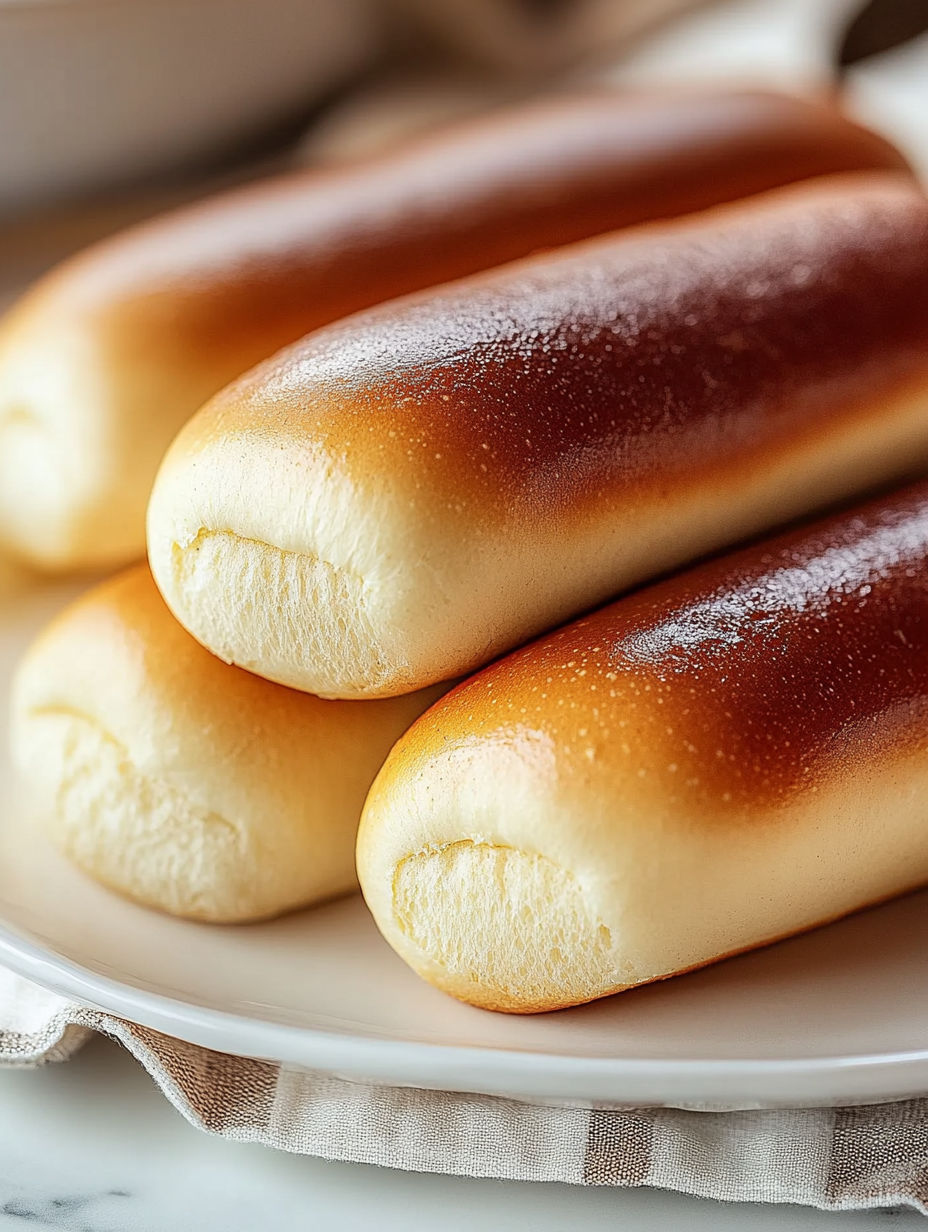
- Crack an egg into a small bowl and whisk until uniform Brushing the tops of your buns results in a shiny bakery style finish If you love seeded buns sprinkle with sesame or poppy seeds Place the tray in the center of your hot oven Bake for fifteen to twenty minutes until buns are golden brown and sound hollow when tapped Remove to a rack to cool a few minutes before serving
One thing that always stands out is how incredibly soft these buns turn out because of the overnight rise If I have time I never skip it The first time my youngest helped roll the dough we ended up with a few lopsided buns but they tasted even better because we had fun together
Storage Tips
Allow buns to cool completely before storing Wrap tightly in foil or plastic and keep in an airtight container They are best within two days but can be kept in the fridge for up to four days For longer storage freeze buns for up to two months and thaw at room temperature or briefly rewarm in the oven
Ingredient Substitutions
If whole milk is not available use two percent or a blend of half and half for richness For a touch of extra flavor brush with melted butter as soon as they come out of the oven Dairy free bakers can use almond milk and vegan butter though the rise may be slightly less
Serving Suggestions
These buns are the gold standard for all types of hot dogs from classic franks to plant based sausages Slice them warm and grill the cut sides for extra flavor They are great for lobster rolls or even breakfast sandwiches if you like to get creative
Cultural and Historical Context
Soft sandwich buns like these became popular in American home kitchens in the twentieth century as backyard grilling took off Many bakeries put their own spin on regional variations Today homemade buns are making a comeback as cooks look for simple pleasures and nostalgic flavors
Seasonal Adaptations
You can easily adapt these buns for different times of year Add fresh chopped herbs to the dough in spring Top with everything bagel seasoning in the fall Brush with honey butter for summer picnics
Success Stories
One of my proudest moments was baking a double batch for July Fourth at the park and not a single bun came home Friends raved that the bread alone made the meal
Freezer Meal Conversion
After baking and cooling place buns in a freezer bag Squeeze out extra air and freeze for up to eight weeks When needed thaw at room temperature and refresh in a warm oven for that just baked softness
Bake a batch of these buns and enjoy the difference homemade makes With a few pantry staples you will be ready for your next cookout
Recipe FAQs
- → How can I make the buns extra soft?
Including whole milk, soft butter, and allowing an overnight rise help create a tender, fluffy texture.
- → Can I use instant yeast instead of active dry yeast?
Yes, substitute in equal amounts and skip the proofing step; simply mix it with the dry ingredients.
- → How do I keep the buns fresh?
Cool completely, then store in an airtight container at room temperature for up to two days or refrigerate for longer.
- → Is a stand mixer necessary?
No, you can knead by hand, though it may take a bit longer to reach the smooth, tacky consistency.
- → Can I freeze the baked buns?
Absolutely! Freeze them in a zip-top bag and thaw at room temperature or reheat in the oven before serving.
- → What toppings work well on these buns?
Egg wash with sesame or poppy seeds adds flavor and visual appeal before baking.