
 Save
Save
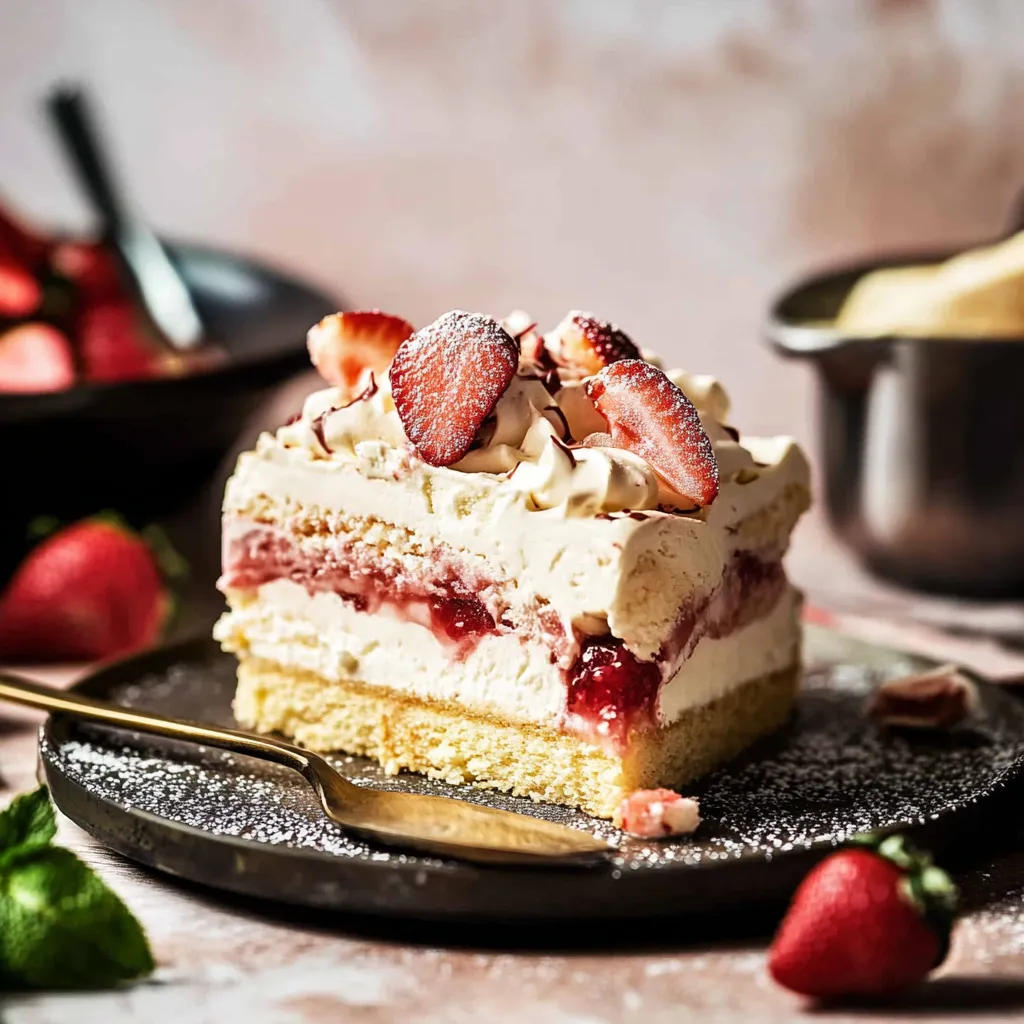
This ice cream cake combines the nostalgic flavor of graham crackers with creamy vanilla ice cream and sweet strawberry ripples. It's the dessert I turn to whenever I need something impressive yet utterly simple to prepare, letting the freezer do most of the work while I enjoy the compliments.
I first made this cake for my nephew's birthday when the oven broke down unexpectedly. What started as a kitchen emergency has become our most requested family celebration dessert, with everyone fighting over the corner pieces with extra strawberry swirls.
Ingredients
- Heavy cream: Transforms into a cloud like layer that adds richness between the ice cream layers
- Powdered sugar: Sweetens the whipped cream without graininess for the smoothest texture
- Vanilla extract: Enhances all the other flavors use pure extract for best results
- Graham crackers: Provide structure and that honey sweet flavor that complements the ice cream perfectly
- Vanilla ice cream: Forms the creamy base choose a quality brand with real vanilla flecks for best flavor
- Strawberry jam: Creates beautiful colorful swirls and pockets of intense berry flavor
- Fresh strawberries: Add texture and brightness look for deeply red berries with no white shoulders
Step-by-Step Instructions
- Prepare the Pan:
- Line your square baking pan with parchment paper, allowing extra to hang over the sides. This creates handles that will help you lift the entire cake out cleanly once frozen. Press the paper into corners for neat edges when serving.
- Whip the Cream:
- In a large chilled bowl, combine the heavy cream, powdered sugar and vanilla. Whip until soft peaks form about 3 to 4 minutes. The cream should hold its shape but still have a slight flop at the peak. Overwhipping will make assembly difficult, so stop before it becomes too stiff.
- Build the Base Layer:
- Place graham crackers in a single layer covering the bottom of the pan. Break pieces as needed to fill gaps. Gently scoop half the slightly softened vanilla ice cream onto the crackers. Using an offset spatula, spread in an even layer working from the center outward to avoid displacing the crackers beneath.
- Add First Cream Layer:
- Dollop half of your freshly whipped cream over the ice cream layer. Spread gently without mixing into the ice cream. Take half of your strawberry jam and drop spoonfuls across the surface. Use a butter knife to create gentle swirls without overmixing. Sprinkle half of the fresh sliced strawberries evenly across the surface.
- Repeat Layers:
- Create a second graham cracker layer, pressing gently to adhere to the cream below. Add remaining ice cream in an even layer, followed by the rest of the whipped cream. Finish with remaining jam swirls and fresh strawberries, creating a beautiful marbled effect on top.
- Freeze Until Set:
- Cover the entire cake with plastic wrap, pressing it directly onto the surface to prevent ice crystals. Freeze for a minimum of 4 hours, though overnight is ideal for the most perfect slices. The longer freeze time allows flavors to meld completely.
- Serve with Style:
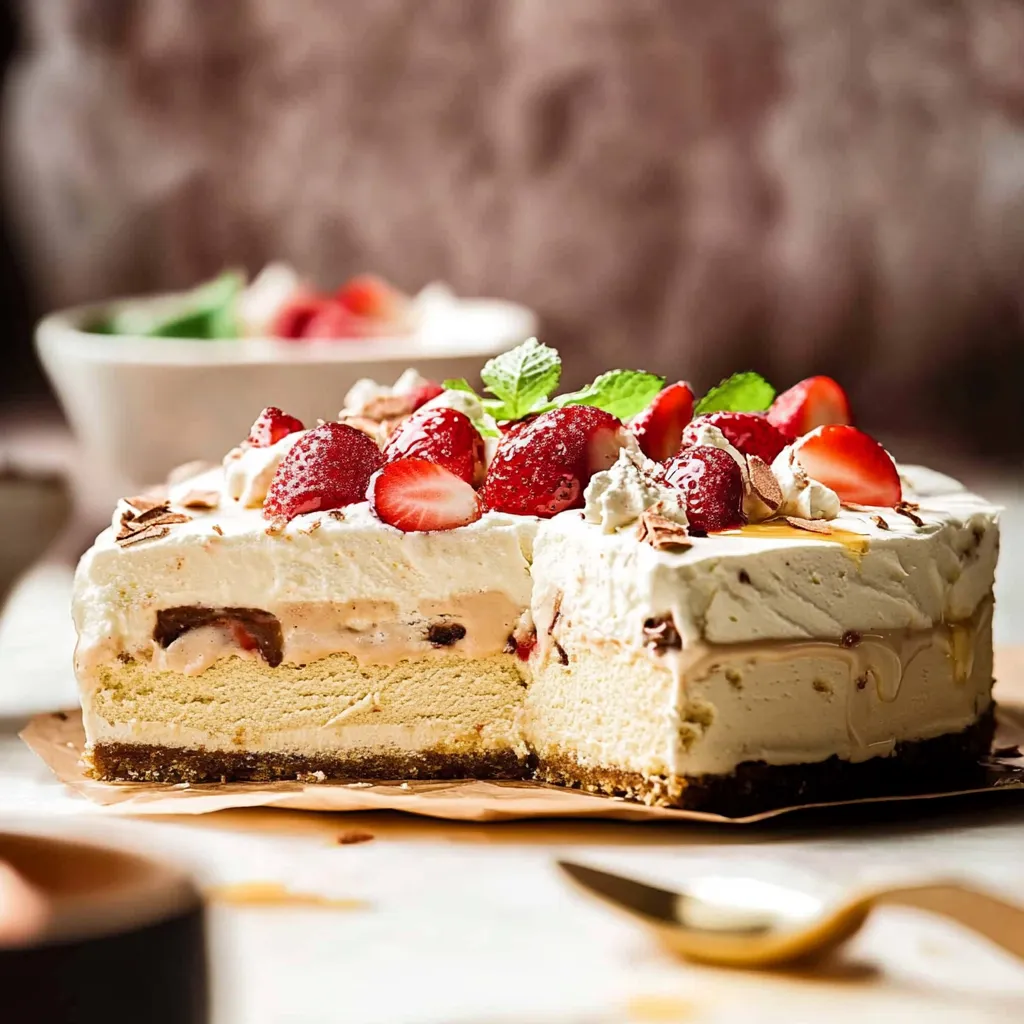
- When ready to serve, use the parchment overhang to lift the entire cake from the pan. Let it stand for exactly 5 minutes at room temperature to slightly soften for easier slicing. Garnish with additional whipped cream and whole fresh strawberries before presenting to guests.
The strawberry jam is truly the secret ingredient in this recipe. When my daughter was little, we made this cake using homemade jam from berries we picked together at a local farm. Years later, she still insists the version made with our homemade jam tastes better than any other dessert I make. The memory of her tiny hands picking berries makes each slice taste sweeter.
Make Ahead Magic
This ice cream cake is the ultimate make ahead dessert. You can prepare it up to two weeks before your event and keep it well wrapped in the freezer. The flavors actually improve with a day or two of freezing as they have time to meld together. This makes it perfect for busy hosts who want to prepare dessert well in advance of a gathering. Just remember to wrap it thoroughly with plastic wrap and then aluminum foil to prevent freezer burn and absorption of other freezer odors.
Creative Variations
While strawberry is a classic pairing, this recipe welcomes endless flavor combinations. Try chocolate ice cream with raspberry jam and fresh raspberries for a decadent twist. For a tropical version, use coconut ice cream with pineapple preserves and fresh mango slices. During fall, pumpkin ice cream with apple butter and candied pecans creates a seasonal delight. The graham crackers can also be swapped for chocolate wafers, ginger snaps, or even crushed sandwich cookies depending on your flavor profile.
Serving Suggestions
This cake transitions beautifully from casual to elegant depending on how you present it. For everyday family dessert, simple slices with a drizzle of chocolate sauce are perfect. For dinner parties, place individual slices on chilled plates with a side of fresh berries and a sprig of mint. For birthdays, decorate the top with candles and surround the cake with a border of colorful berries. Consider serving with a small glass of dessert wine for adults or warm hot chocolate for children during winter months.
The Secret to Beautiful Slices
Achieving those picture perfect slices requires a bit of technique. First, make sure the cake has been frozen at least 4 hours but ideally overnight. Fill a tall glass with hot water and have a clean kitchen towel nearby. Dip your long, sharp knife into the hot water for 30 seconds, then wipe completely dry. Make a clean slice through the cake using one smooth motion. Re heat and wipe the knife between each slice. This prevents dragging and creates those gorgeous defined layers that make this dessert so impressive when served.
Recipe FAQs
- → Can I use different flavors of ice cream?
Absolutely! While the original uses vanilla ice cream, you can substitute with chocolate, strawberry, or any flavor that complements the strawberries. For a more complex flavor profile, consider using different ice cream flavors in each layer.
- → How long can I store this cake in the freezer?
When properly wrapped in plastic wrap and then aluminum foil, this ice cream cake will keep well in the freezer for up to 2 weeks. After that, ice crystals may start to form and affect the texture, though it remains safe to eat.
- → Can I use other fruits instead of strawberries?
Yes! This dessert works beautifully with many fruits. Try raspberries, blueberries, peaches, or mangoes. Just make sure to use complementary jam flavors and adjust sweetness as needed depending on the fruit's natural sugar content.
- → Why is my cake hard to slice?
Frozen desserts are always challenging to slice. For clean cuts, let the cake sit at room temperature for 5-10 minutes before slicing, and warm your knife under hot water between each cut, drying it thoroughly before slicing.
- → Can I make this without dairy?
Yes, this can be adapted for dairy-free diets. Use dairy-free ice cream, coconut cream instead of heavy cream (whipped when cold), and ensure your graham crackers are dairy-free. The result will have a slightly different texture but still be delicious.
- → What can I substitute for graham crackers?
If graham crackers aren't available, you can use digestive biscuits, vanilla wafers, or any plain, crisp cookie. You could also create a more traditional crust by crushing cookies and mixing with melted butter for the bottom layer only.