
 Save
Save
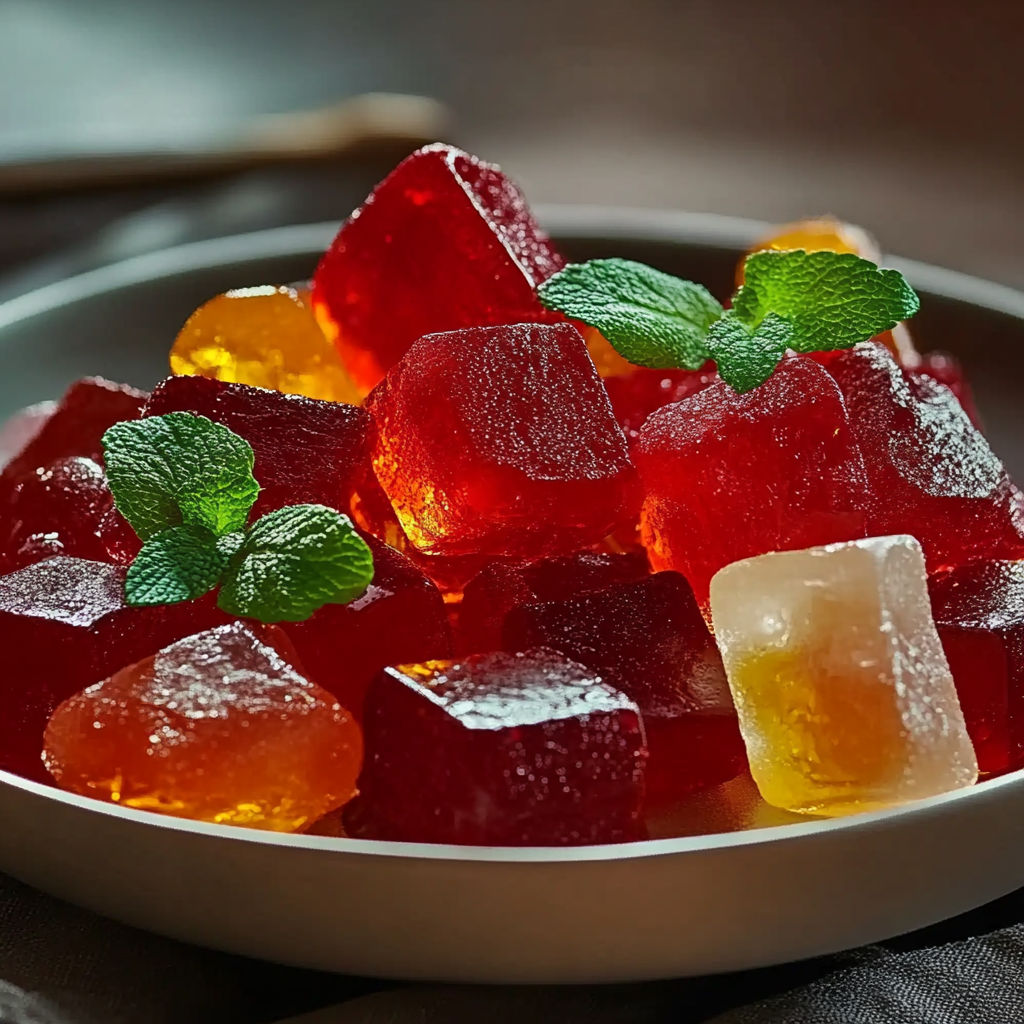
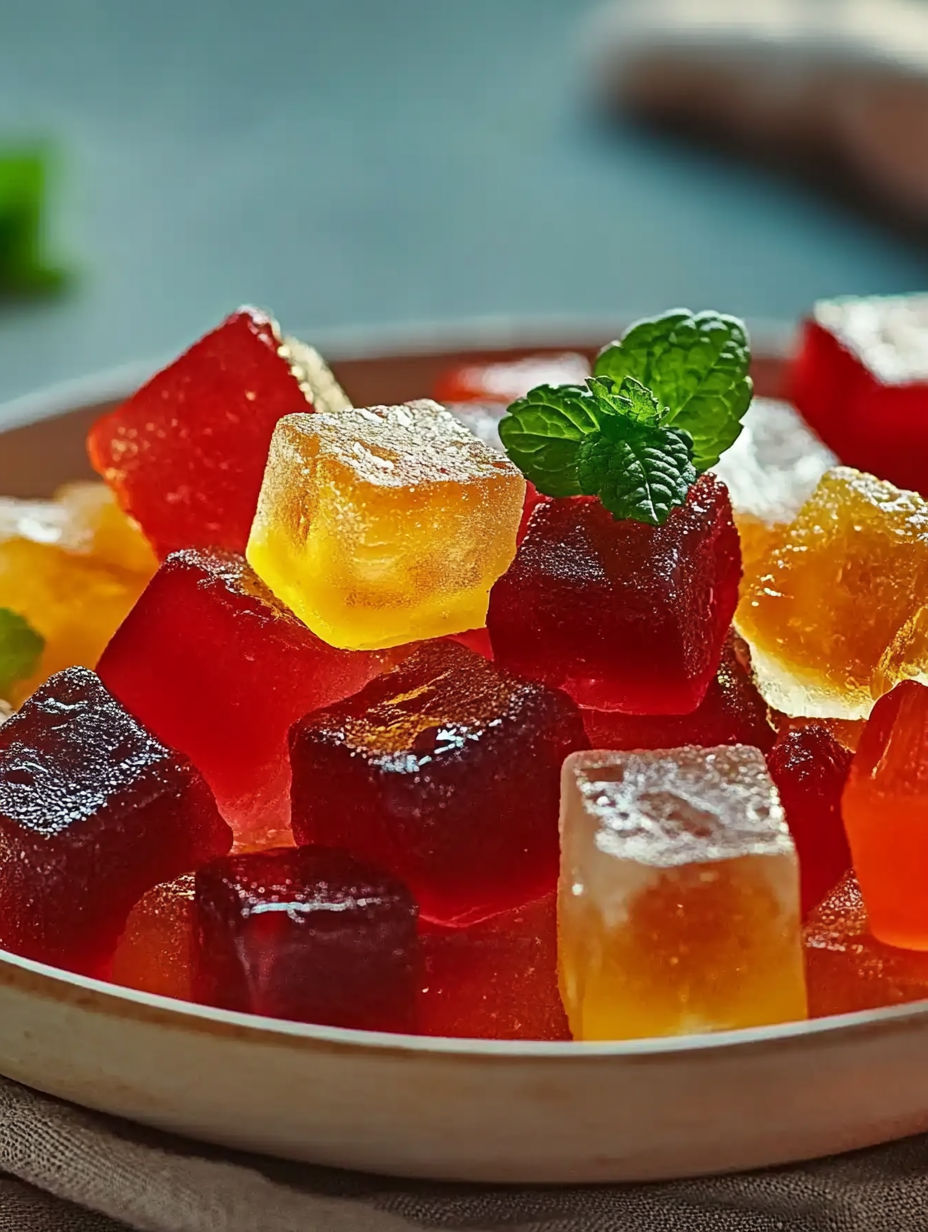
Making homemade gelatin gummies means you control both the flavors and the quality of the ingredients. These chewy treats are a joy to make with kids and are perfect for lunchboxes snack jars or even as a creative edible gift. I always whip up a batch before a long week so my family has a better for you sweet ready to go.
My first time trying these gummies was pure curiosity and to my surprise they disappeared in one day. Now making gummies is a weekend ritual for us especially when I spot beautiful tart cherries or cranberries.
Ingredients
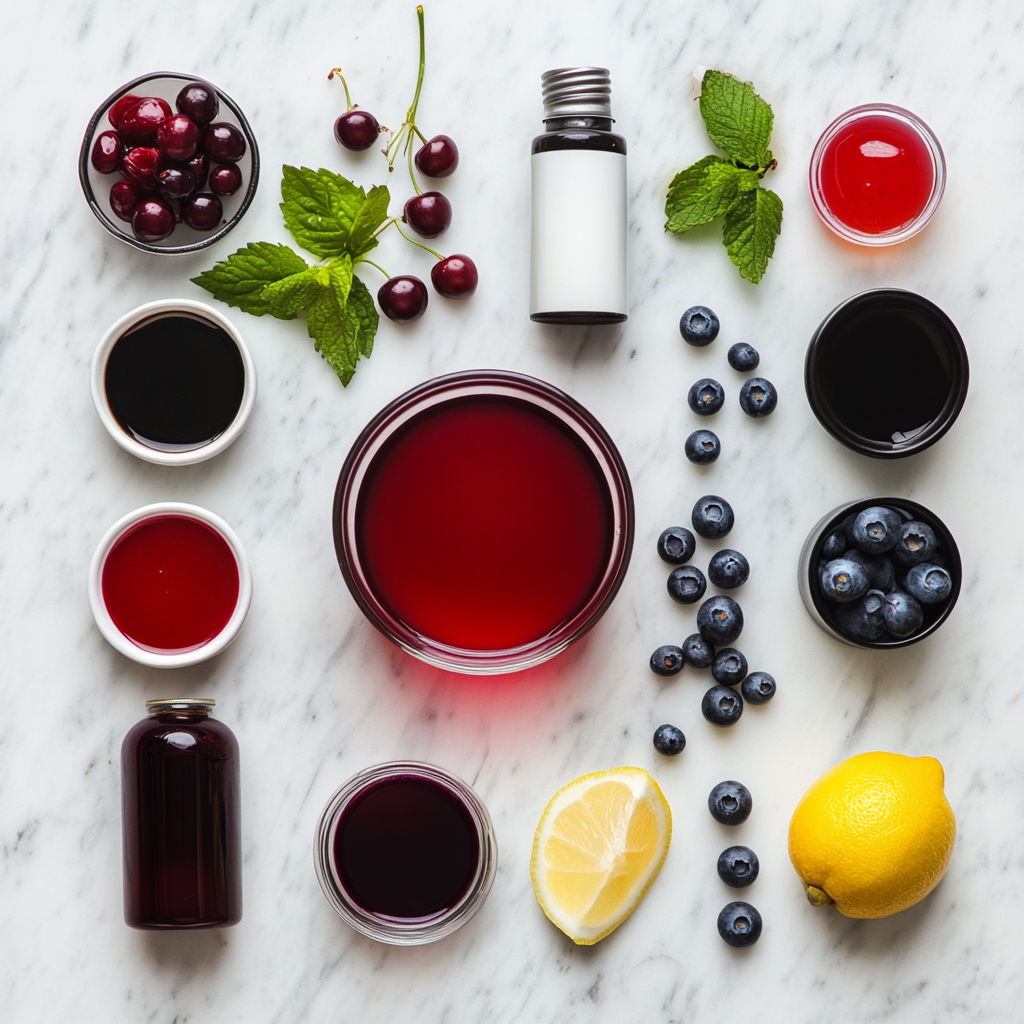
- Tart cherry or cranberry juice: Brings bright color and tang choose pure juice for best results
- Grass fed gelatin powder: Gives the gummies their signature texture seek out a high quality brand for best setting and benefits
- Raw honey or maple syrup: Adds natural sweetness taste as you go to adjust
- Lemon juice: Gives a zip of freshness only use fresh lemon for brightest flavor
- Optional corn syrup or extra honey: Helps mimic that classic candy chew especially if you love gummy bears
- Optional citric acid: Provides a sour punch go for this if you love sour gummies
Instructions
- Prepare the Gelatin:
- Pour half the juice into a mixing bowl and scatter the gelatin powder evenly over the surface. Let it sit for about five minutes so the gelatin fully absorbs the juice and expands. This blooming step prevents any lumps and ensures super smooth gummies.
- Warm the Juice:
- Heat the remaining juice just until it is steaming hot but not yet boiling. You want it warm enough to melt the gelatin but not so hot it breaks down the gelling power.
- Combine and Dissolve:
- Gently whisk the hot juice into the bowl with the bloomed gelatin. Keep stirring until all the grains disappear and your mixture is silky and thoroughly combined.
- Sweeten and Brighten:
- Blend in the honey and the lemon juice until everything is dissolved. At this point taste and decide if you would like the extra tang from citric acid or a bit more sweetness with another splash of maple syrup.
- Mold and Chill:
- Pour the liquid into silicone molds of your choice or even a lightly greased pan for cubes. Aim for small even pieces so they set quickly. Place the filled molds in your fridge for at least two hours. The gummies will firm up and become bouncy to the touch.
- Unmold and Cure:
- Carefully remove your gummies from the molds and lay them out in a single layer at room temperature. Let them sit for one to two days uncovered. This curing step enhances their shelf stability and gives a satisfying chewy bite.
When I first experimented with adding a splash of citric acid the kids declared these taste like real sour candies from the store. Cherry is still my favorite flavor and every batch disappears faster than I ever expect especially after lunches.
Storage Tips
Store your gummies in an airtight container at room temperature if you want a softer chew or pop them in the fridge for up to two weeks if you like them extra firm. Separate layers with wax paper if they are sticky. Avoid humid bathrooms or kitchens which can make them weep.
Ingredient Substitutions
For refined sugar free gummies stick to honey or use only unsweetened juice. For vegan gummies try an agar based recipe instead of gelatin as standard gelatin is animal derived. For an even firmer texture use less juice or a touch more gelatin.
Serving Suggestions
Pile them into candy jars for a colorful countertop treat. Use star heart or bear molds to make them extra fun for kids. I love dropping them into a baggy for a grab and go lunch smile or packing a jarful as a party favor.
Cultural and Historical Context
Gelatin based candies have been made for centuries especially in Europe. Their texture and shelf life made them popular before refrigeration and modern candies came on the scene. Gummy bears were first invented in Germany in the 1920s. Today homemade gummies let you skip all the preservatives and dyes.
Seasonal Adaptations
Use apple or pear juice with cinnamon for autumn flavors. Try watermelon or strawberry juice in spring and summer. A dash of clove or cardamom adds lovely spice for winter gummies.
Success Stories
I have shared this recipe with friends who needed dye free snack options for their little ones. Every single time I am told lifelong candy lovers end up preferring their homemade version. One friend even adapted the recipe with vitamin drops for immune support and her picky son ate them up.
Freezer Meal Conversion
You can freeze gummies for several months but expect them to firm up even more. Before freezing spread them out on a tray to avoid sticking. Thaw in the refrigerator to retain texture rather than on the counter.
I once hurried and skipped the curing step. The result was gummies that wept and stuck together so patience pays off for the best chewy bite.
Recipe FAQs
- → How do I achieve a firm gummy texture?
Increase gelatin to two tablespoons per cup of liquid for firmer, candy-like gummies. Let them cure at room temperature after unmolding to develop extra chew.
- → Can I use different juices besides cherry or cranberry?
Yes, you can try other clear fruit juices. Just avoid fresh pineapple or kiwi, as their enzymes prevent gelatin from setting.
- → What is the best way to sweeten these gummies?
Use raw honey or maple syrup for natural sweetness. Add more or less to taste, and mix thoroughly while the gelatin is still warm.
- → How should the gummies be stored?
Keep gummies in an airtight container. They last up to 5 days at room temperature or up to 2 weeks in the refrigerator.
- → How can I make these gummies suitable for weight loss?
Use water and cranberry juice along with unflavored gelatin for a lower-sugar, lighter treat.