
 Save
Save
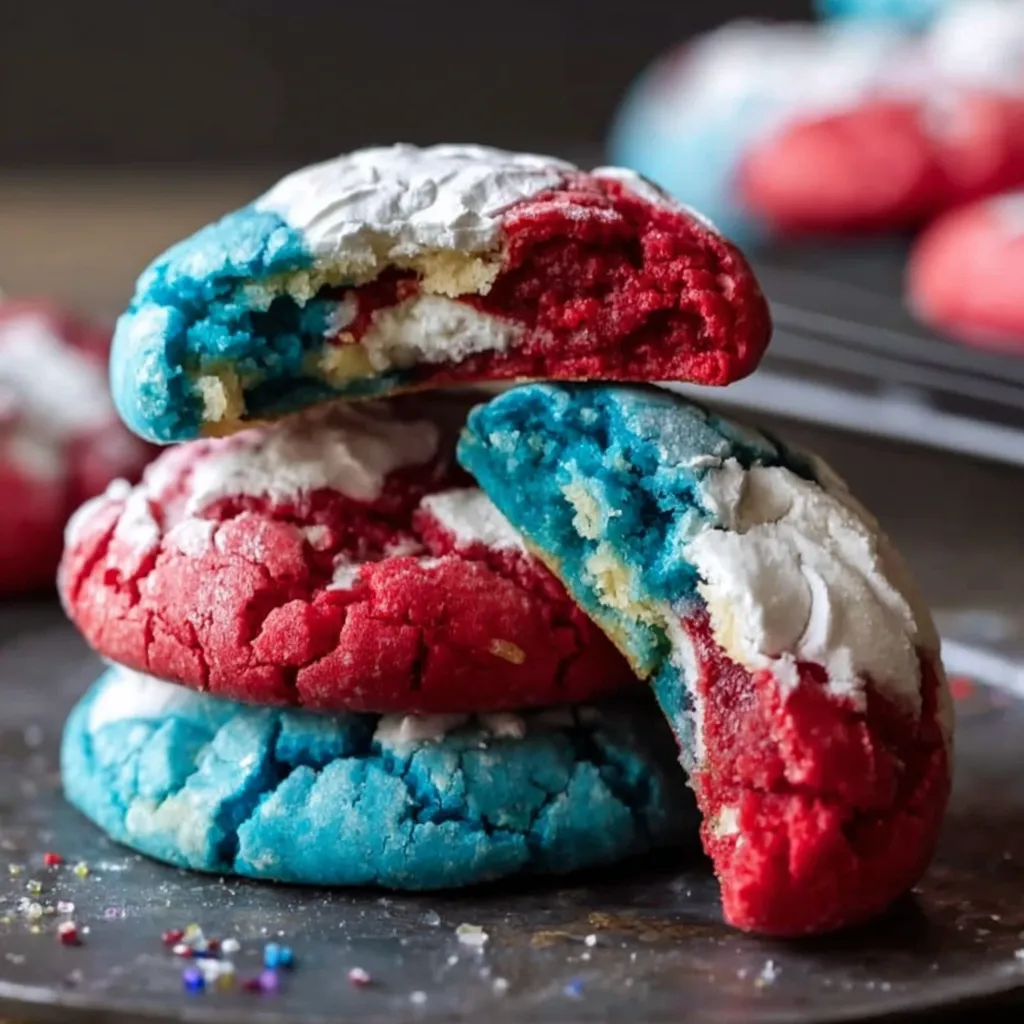
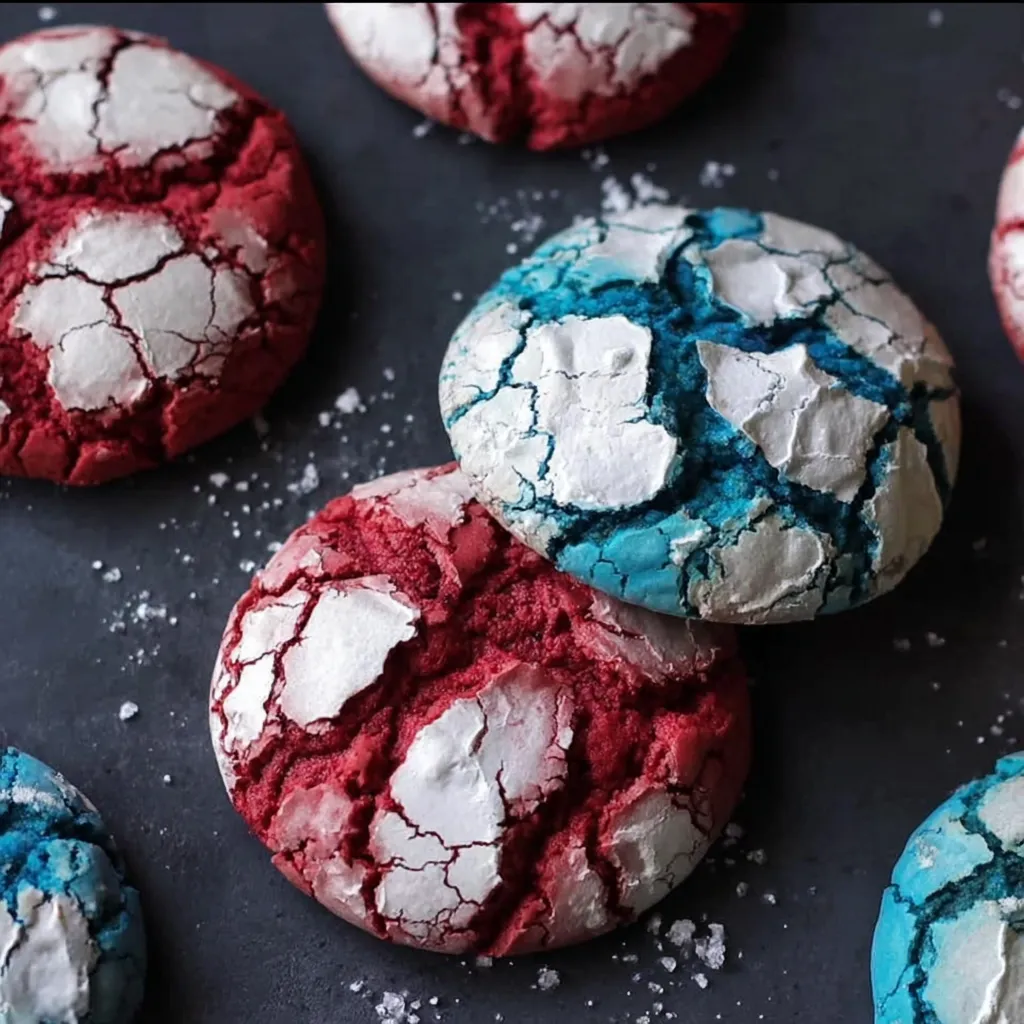
These colorful patriotic crinkle cookies are the ultimate show-stopping treat for your Fourth of July celebration. The beautiful marbling of red, white, and blue creates a stunning visual effect while maintaining that classic crinkle cookie texture everyone loves - a perfectly crisp exterior with a soft, chewy center. I first made these for a neighborhood block party last summer, and they disappeared faster than the fireworks overhead.
I originally created these when my daughter's class needed treats for their end-of-year party near July 4th. What started as a simple classroom contribution has become our family's most requested summer tradition.
Ingredients
- All-purpose flour: The backbone of our cookie that provides structure and that perfect chewy texture. Use a kitchen scale for most accurate measurements.
- Baking powder: Gives our cookies the perfect rise and slight dome that helps create those beautiful cracks.
- Salt: Enhances all the flavors and balances the sweetness. Even in sweet recipes, never skip this critical ingredient.
- Unsalted butter: Room temperature butter creams perfectly with sugar. The key is truly letting it soften naturally for best results.
- Granulated sugar: Provides sweetness and helps create those crispy edges while maintaining a soft center.
- Eggs: Room temperature eggs incorporate more evenly into the dough. Place cold eggs in warm water for 5 minutes if you forget to set them out.
- Vanilla extract: Adds depth and warmth. Use pure vanilla extract for the best flavor profile.
- Red and blue gel food coloring: Gel coloring is crucial here as it provides vibrant color without adding excess liquid to your dough.
- Powdered sugar: Creates that beautiful snow-like cracked exterior that gives crinkle cookies their signature look.
Step-by-Step Instructions
- Cream the Butter and Sugar:
- Beat the room temperature butter and granulated sugar together until the mixture becomes noticeably lighter in both color and texture. This takes a full 2 to 3 minutes. This step incorporates air which gives the cookies their tender structure.
- Add the Eggs and Vanilla:
- Add each egg individually, ensuring the first is fully incorporated before adding the second. The mixture might look slightly curdled at first but will smooth out. The vanilla goes in last to add that warm aromatic quality.
- Whisk the Dry Ingredients:
- Thoroughly whisk the flour, baking powder, and salt in a separate bowl. This distributes the leavening agent evenly throughout the flour, ensuring your cookies rise uniformly.
- Combine Wet and Dry Ingredients:
- Add the dry ingredients gradually to prevent flour from flying everywhere. Mix just until no dry streaks remain. Overmixing at this stage develops gluten which can make your cookies tough rather than tender.
- Divide and Color the Dough:
- Use a kitchen scale if available to divide the dough perfectly into three equal portions. When adding the gel coloring, start with a small amount and build up to your desired shade. Remember the color will lighten slightly during baking.
- Form Multicolor Dough Balls:
- Take approximately a teaspoon-sized piece from each color. The key is not to blend them completely. Press them together gently so they stick but maintain distinct color sections. When you roll them, aim for just enough cohesion that they won't fall apart.
- Coat with Powdered Sugar:
- Roll each ball generously in powdered sugar until completely covered with no dough visible. The thicker the coating, the more dramatic the crinkle effect will be after baking.
- Arrange on Baking Sheet:
- Place cookies with ample space between them. These cookies will spread during baking, so the 2-inch spacing is important for preventing them from merging together.
- Bake:
- Watch for the visual cues. The cookies should puff up, develop cracks in the powdered sugar, and just barely set around the edges while still looking slightly underdone in the center.
- Cool:
- Allowing the cookies to rest on the hot baking sheet for 5 minutes lets them firm up enough to transfer without breaking. They continue cooking slightly from residual heat during this time.
My favorite part of making these cookies is seeing the unique patterns that emerge during baking. My daughter always claims the cookies with the most balanced red, white, and blue distribution, while my son hunts for ones with the most dramatic cracking pattern.
Make-Ahead Options
These patriotic crinkle cookies work beautifully for advance preparation. You can make the dough up to 2 days before needed, storing it tightly wrapped in the refrigerator. When ready to bake, allow the dough to sit at room temperature for about 30 minutes to make it easier to work with. You can even roll the balls and freeze them on a baking sheet, then transfer to a freezer bag for up to a month. When ready to bake, roll the frozen balls in powdered sugar and add 1-2 minutes to the baking time.
Troubleshooting Tips
If your cookies spread too much during baking, your butter might have been too warm. The dough should feel cool to the touch before rolling into balls. If your kitchen is particularly warm, refrigerate the dough for 15-30 minutes before shaping. If your powdered sugar seems to disappear during baking, you likely didn't use enough. The coating should be very generous, almost looking excessive before baking. Finally, if your colors bleed together too much, work with cooler dough and handle it less when forming the balls.
Serving Suggestions
These patriotic cookies are stunning on their own but truly shine as part of a themed dessert display. Arrange them on a white platter alongside fresh blueberries and strawberries for an Instagram-worthy presentation. They pair wonderfully with vanilla ice cream for a simple but festive dessert. For a spectacular finish to your Fourth of July barbecue, use them to garnish the sides of a simple vanilla cake frosted with white buttercream. The cookies also make charming edible gifts when packaged in clear cellophane bags tied with patriotic ribbon.
Storage Information
These cookies stay remarkably fresh for several days when stored properly. Place them in an airtight container at room temperature with parchment paper between layers to prevent sticking. They maintain their best texture for about 3-4 days. If you need to store them longer, they freeze beautifully for up to 3 months. Thaw at room temperature for about an hour before serving. Avoid refrigerating these cookies as it can make them lose their tender texture.
Recipe FAQs
- → How do I get vibrant colors without affecting the dough texture?
Use gel food coloring rather than liquid food coloring. Gel colors provide intense vibrancy without adding excess moisture that could alter the dough consistency. Start with a small amount and gradually add more until you achieve your desired shade.
- → Can I make the dough ahead of time?
Yes, you can prepare the dough up to 24 hours in advance. Store it covered in the refrigerator, then let it sit at room temperature for about 20 minutes before rolling into balls. This can actually improve the flavor as the ingredients have time to meld together.
- → Why are my cookies spreading too much during baking?
If your cookies are spreading excessively, your butter might be too warm or your kitchen too hot. Chill the dough for 15-30 minutes before rolling into balls. Also, make sure your baking sheet isn't warm from a previous batch when placing new dough balls.
- → How do I get the best crinkle effect?
For the most dramatic crinkle pattern, ensure the dough balls are completely and generously coated with powdered sugar. The thicker the coating, the more dramatic the cracks will be. Also, make sure your oven is fully preheated before baking.
- → How should I store these cookies?
Store cooled cookies in an airtight container at room temperature for up to 5 days. Place parchment paper between layers to prevent sticking. They can also be frozen for up to 3 months if wrapped well in plastic and stored in a freezer-safe container.
- → Can I use different color combinations for other holidays?
Absolutely! This technique works beautifully with any color combination. Try green and red for Christmas, orange and black for Halloween, or team colors for game days. Just adjust the gel food coloring accordingly while keeping the base dough recipe the same.