
 Save
Save
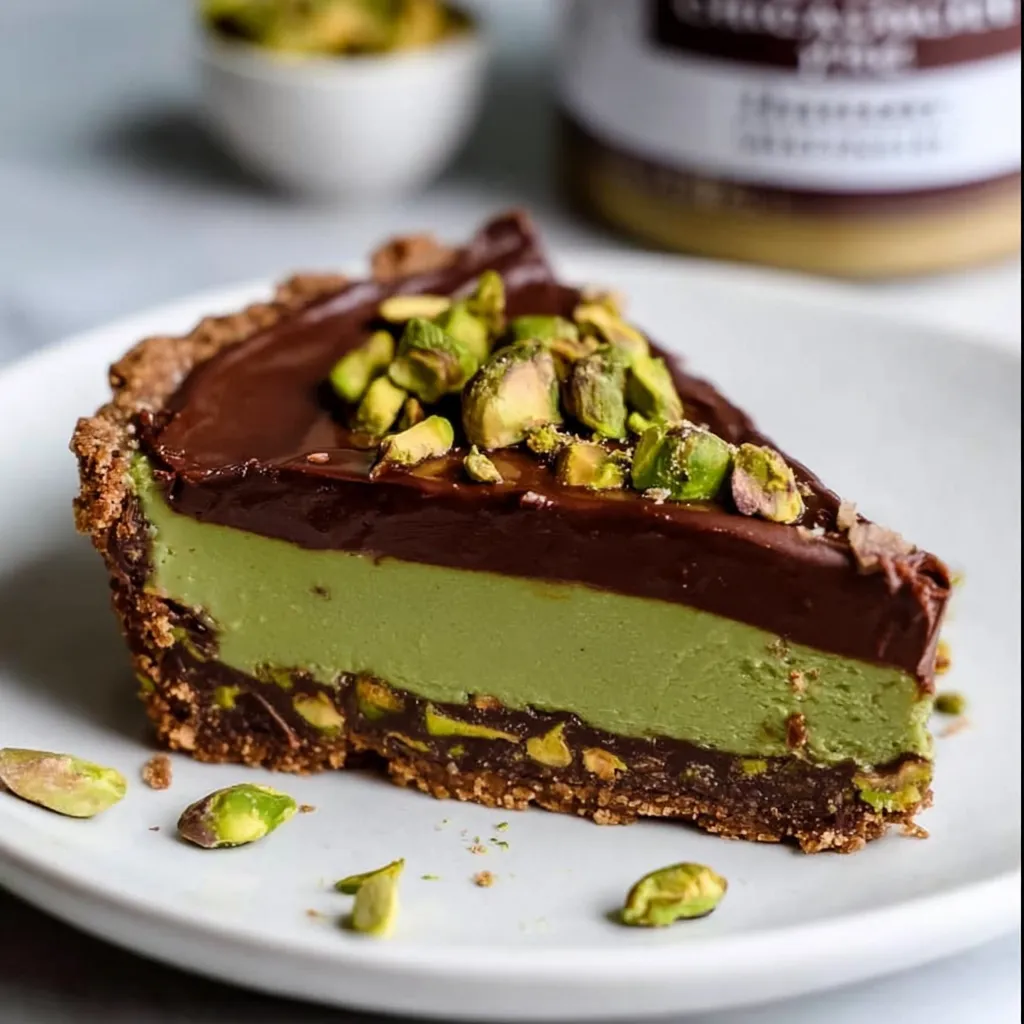
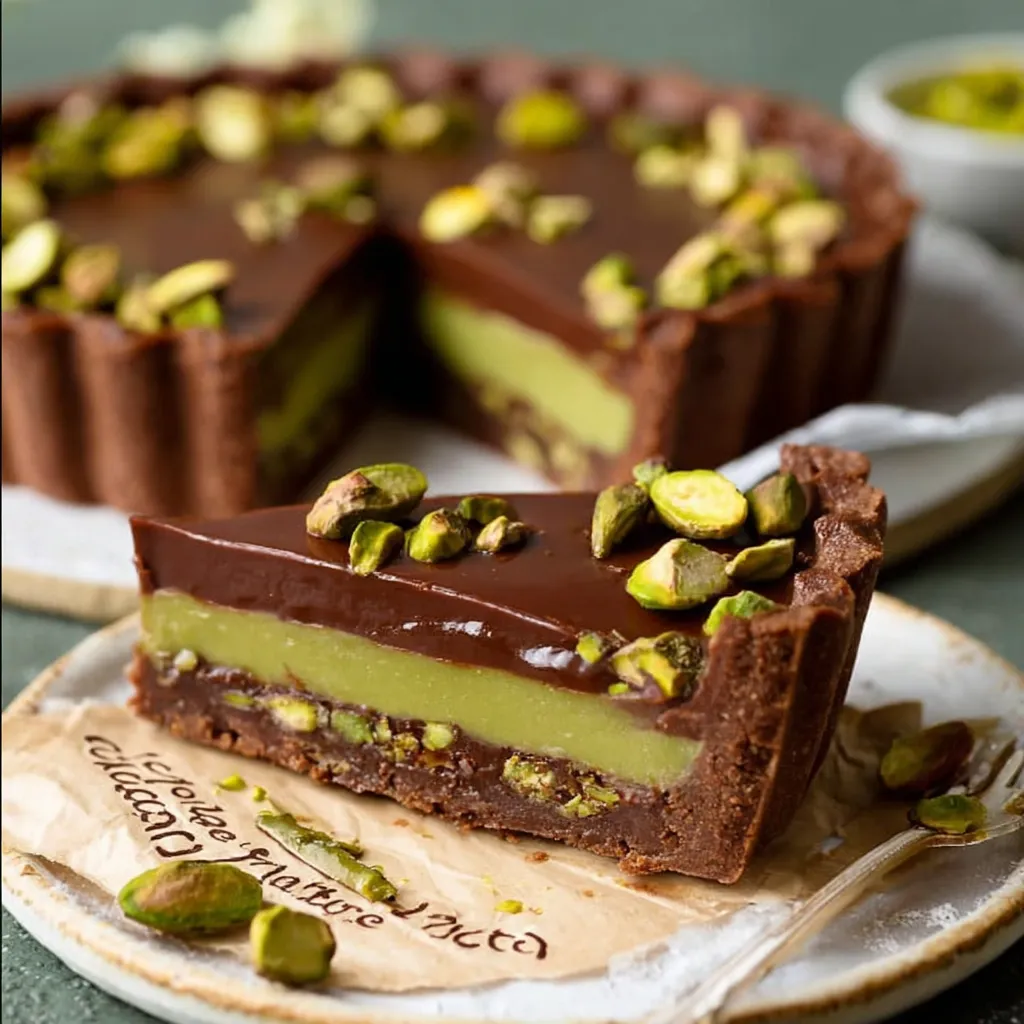
This chocolate pistachio ganache tart transforms simple ingredients into an elegant dessert with distinct layers of flavor and texture. The cocoa pastry shell provides the perfect foundation for rich chocolate ganache, creamy pistachio filling, and a glossy chocolate topping that creates a stunning visual presentation.
I first created this tart for my sister's birthday dinner and the combination of chocolate and pistachio was such a hit that it's now requested at every family gathering. The contrasting layers always impress guests who can't believe it was made at home.
Ingredients
For the Chocolate Tart Shell
- All purpose flour: Creates the perfect tender yet sturdy base for all those luscious fillings
- Unsweetened cocoa powder: Adds depth and intensifies the chocolate experience throughout each bite
- Cold butter: Cubed for easier incorporation ensures a flaky tender crust
- Powdered sugar: Provides sweetness without grittiness for a more refined texture
- Large egg yolk: Binds everything together while adding richness
- Cold milk: Helps bring the dough together without overworking
- Pinch of salt: Enhances all the flavors and balances sweetness
For the Bottom Ganache Layer
- Heavy cream: With high fat content creates the silkiest texture
- Dark chocolate: With at least 60% cocoa solids delivers intense flavor without excessive sweetness
- Vanilla extract: Enhances the chocolate notes beautifully
- Pinch of salt: Balances and amplifies the chocolate flavor
For the Pistachio Layer
- Unsalted shelled pistachios: Provide the signature nutty flavor and gorgeous green color
- Whole milk: Adds creaminess while helping blend the pistachios smoothly
- Heavy cream: Creates luxurious richness in the pistachio custard
- Granulated sugar: Balances the natural bitterness of pistachios
- Cornstarch: Stabilizes and thickens the custard for perfect slicing
- Almond extract: Optional but enhances the nutty flavor profile wonderfully
For the Top Ganache Layer
- Heavy cream: Creates a pourable yet firm set ganache
- Dark chocolate: Adds the perfect finishing touch of bittersweet flavor
- Butter: Creates that beautiful glossy shine and improves texture
Step-by-Step Instructions
Prepare the Chocolate Pastry
- Step 1:
- Combine the dry ingredients first by whisking flour, cocoa powder, powdered sugar and salt until evenly distributed. Add cold cubed butter and work quickly with fingertips until the mixture looks like coarse sand with some pea sized pieces remaining for flakiness. Mix in egg yolk which adds richness and helps bind everything together. Add cold milk gradually just until the dough comes together without becoming sticky. Form into a disc shape which makes rolling easier later and wrap tightly before chilling for at least 30 minutes to relax the gluten and firm up the butter.
Blind Bake to Perfection
- Step 2:
- Preheat your oven to ensure even baking. Roll the chilled dough evenly to about 1/8 inch thickness working from the center outward. Carefully transfer to your tart pan by rolling the dough around your rolling pin then unrolling over the pan. Press gently into corners without stretching the dough which would cause shrinkage. Trim excess dough by rolling your pin across the top of the pan. Prick the base thoroughly with a fork to prevent bubbling. Line with parchment and add weights to maintain the shape during baking. After the initial baking remove weights to allow the bottom to crisp up completely. Cool fully before filling to prevent soggy bottom.
Create the Foundation Layer
- Step 3:
- Heat cream gently watching carefully for tiny bubbles around the edge without letting it boil fully which could burn. Pour over chopped chocolate ensuring all pieces are submerged. Let stand without stirring allowing the hot cream to melt the chocolate fully. After two minutes stir from the center outward with a silicone spatula until completely smooth and glossy. Add vanilla and salt which enhance the chocolate flavor. Pour immediately into cooled tart shell and spread evenly to create a level foundation. Chill until completely set which prevents layers from mixing.
Craft the Pistachio Layer
- Step 4:
- Process pistachios and milk until extremely smooth which may take several minutes depending on your blender strength. Transfer to a saucepan and add remaining ingredients. Cook over medium heat stirring constantly with a wooden spoon or heat resistant spatula to prevent burning. Watch for thickening which happens rather quickly once the mixture reaches a certain temperature. You'll know it's ready when it coats the back of a spoon and a finger drawn through leaves a clear path. Cool slightly before spreading over the set chocolate layer. The slight cooling prevents melting the ganache underneath while still being spreadable.
Top with Glossy Ganache
- Step 5:
- Prepare the final ganache layer using the same method as the base layer but with the addition of butter which creates an extra glossy finish. Heat cream to just below simmering watching for those telltale bubbles around the edge. Pour over chocolate and butter letting stand briefly before stirring. Pour this ganache very gently over the pistachio layer using the back of a spoon to guide it and prevent it from breaking through the pistachio layer. Smooth carefully with an offset spatula dipped in hot water for the most polished finish.
Finish and Set
- Step 6:
- Sprinkle pistachios around the perimeter of the tart while the top ganache is still slightly soft so they adhere properly. Chill for at least one hour or ideally several hours for the cleanest slices. The patience required for proper setting rewards you with perfectly defined layers when sliced.
My absolute favorite part of this recipe is the moment the pistachio cream comes together. The transformation from liquid to velvety custard happens almost magically, and the vibrant green color against the dark chocolate layers creates such a stunning visual contrast. My grandmother actually inspired this recipe with her love of pistachios that she developed during her travels through Italy decades ago.
Perfect Pistachio Selection
For the most vibrant color and best flavor in your pistachio layer, look for pistachios with bright green color rather than yellowish or brownish tones. Raw unsalted pistachios work best for this recipe as they blend more smoothly and have a cleaner flavor profile. If you can only find roasted pistachios, reduce the roasting on your garnish pistachios to prevent an overly strong roasted flavor that might compete with the delicate chocolate. Soaking your pistachios in hot water for 30 minutes before blending will help achieve a smoother consistency in your pistachio cream.
Serving Suggestions
This tart reaches its peak flavor when served slightly chilled but not cold from the refrigerator. Remove it about 15 minutes before serving to allow the ganache to soften just enough for the perfect mouthfeel while still maintaining clean slices. Pair each slice with a small scoop of vanilla bean ice cream or a dollop of lightly sweetened whipped cream to balance the richness. For special occasions, dust the top with a light sprinkle of edible gold dust just before serving for an elegant finishing touch that catches the light beautifully.
Make-Ahead Options
This showstopper dessert is actually ideal for preparing in advance. The fully assembled tart keeps beautifully in the refrigerator for up to 3 days, with flavors actually improving after the first 24 hours as they meld together. You can also prepare the components separately if time is limited. The tart shell can be blind baked up to 3 days ahead and stored at room temperature in an airtight container. The pistachio filling can be made 2 days ahead and refrigerated separately, though you may need to warm it slightly before spreading. For freezing, the fully baked but unfilled tart shell freezes well for up to a month when wrapped properly.
Recipe FAQs
- → Can I make this tart in advance?
Yes, you can prepare this tart up to 24 hours in advance. Store it covered in the refrigerator. For the best texture and flavor, remove it from the refrigerator about 20-30 minutes before serving.
- → How do I achieve a smooth pistachio cream layer?
For the smoothest pistachio cream, use a high-powered blender when processing the pistachios with milk. If you notice any graininess, strain the mixture through a fine-mesh sieve before cooking. Ensuring the pistachios are finely ground initially will result in the best texture.
- → Can I substitute the pistachios with other nuts?
While pistachios provide the signature flavor and color, you could substitute with blanched almonds or hazelnuts for a different but complementary flavor profile. The technique remains the same, but the final taste and appearance will vary.
- → What type of chocolate works best for the ganache layers?
Use high-quality dark chocolate with at least 60% cocoa content for the best flavor. The bitterness of dark chocolate balances the sweetness of the other components. Avoid chocolate chips as they contain stabilizers that can affect the ganache's texture.
- → How should I store leftovers?
Store leftover tart covered in the refrigerator for up to 3 days. The cocoa pastry may soften slightly over time but will remain delicious. For longer storage, individual slices can be frozen for up to 1 month - wrap each slice in plastic wrap and place in an airtight container.
- → Can I make a gluten-free version of this tart?
Yes, substitute the all-purpose flour with a gluten-free flour blend that includes xanthan gum. The filling is naturally gluten-free, so only the pastry shell requires modification. Be aware that gluten-free pastry may be more delicate to work with.