
 Save
Save
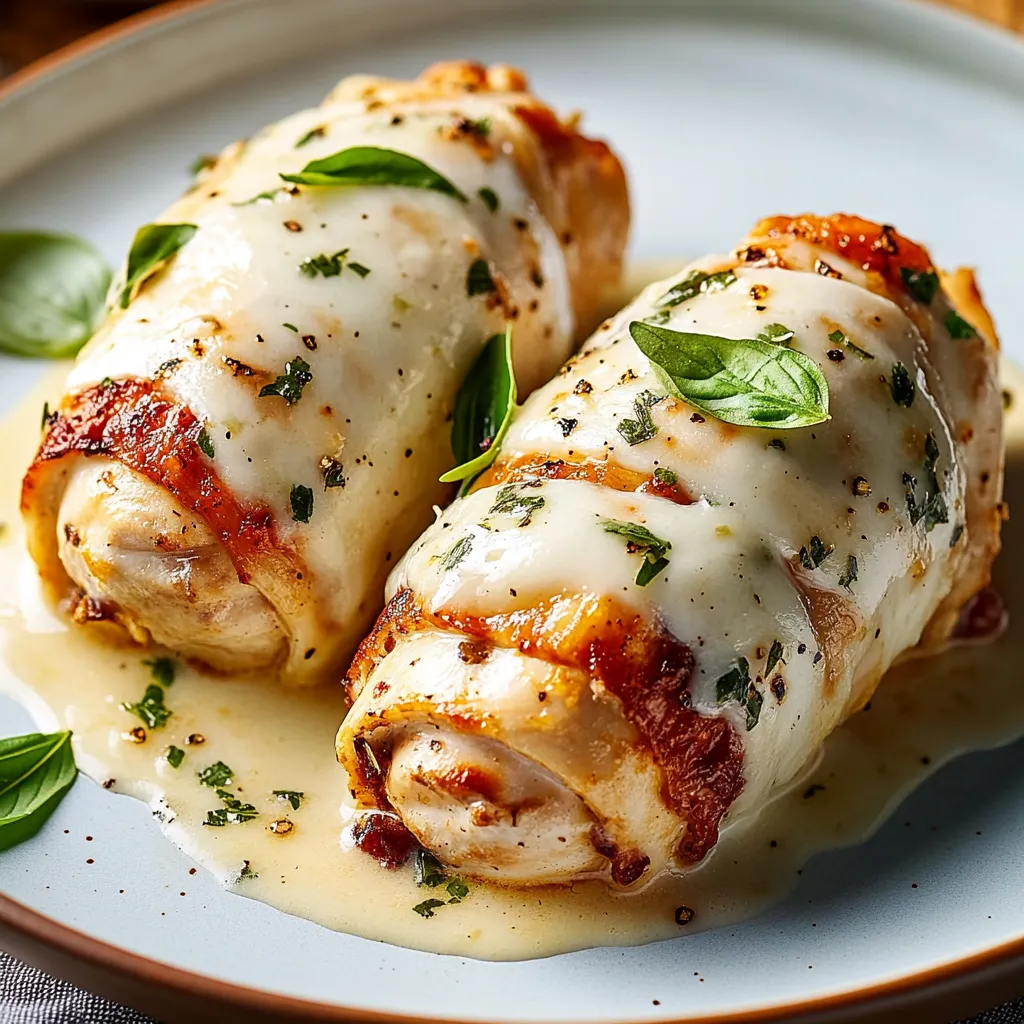
This elegant chicken rollatini transforms ordinary chicken breasts into an impressive Italian-inspired meal that looks like it came from a restaurant kitchen. The combination of creamy cheeses, vibrant spinach, and tender chicken creates a dish that's both comforting and sophisticated.
I first made this rollatini for a dinner party when I wanted something beyond the usual chicken dishes. The moment I saw my guests cut into these spiraled beauties and reveal the melty filling, I knew this would become a signature dish in my repertoire.
Ingredients
- Chicken breasts: These form the foundation of our dish look for uniform thickness to ensure even cooking
- Mozzarella cheese: Adds that signature stretch and mild flavor choose whole milk for richness
- Ricotta cheese: Creates a creamy base for the filling use fresh for best texture
- Parmesan cheese: Provides savory umami depth freshly grated makes a noticeable difference
- Fresh spinach: Balances the richness with nutrients and color buy prewashed to save time
- Italian breadcrumbs: Creates the golden exterior coating make your own or use store bought
- Eggs: Acts as the glue for the breadcrumb coating use room temperature for better adhesion
- Olive oil: Provides flavor and helps with browning choose extra virgin for best taste
- Garlic powder: Infuses aromatic flavor throughout without texture issues
- Dried basil: Offers classic Italian flavor without wilting like fresh herbs would
- Salt and pepper: Enhances all other flavors be generous with both
Step-by-Step Instructions
- Pound the Chicken:
- Place each breast between plastic wrap and use gentle, even strokes with a meat mallet until you reach a consistent ¼-inch thickness throughout. This crucial step ensures the chicken cooks evenly and rolls easily without tearing.
- Create the Filling:
- Combine all three cheeses in a bowl along with your sautéed and cooled spinach. Mix in the garlic powder, dried basil, salt and pepper until fully incorporated. Taste the mixture to ensure proper seasoning before spreading it on the chicken.
- Roll with Precision:
- Lay each flattened breast smooth side down and spread approximately 2-3 tablespoons of filling, leaving a half-inch border around the edges. Starting from the narrower end, roll the chicken tightly, tucking in any loose filling as you go. Secure each roll with 2-3 toothpicks inserted at different angles.
- Bread the Rolls:
- Set up your breading station with beaten eggs in one shallow dish and breadcrumbs in another. Dip each roll completely in egg, allowing excess to drip off, then roll thoroughly in breadcrumbs, pressing gently to adhere. For extra crispy coating, repeat the egg and breadcrumb steps.
- Master the Cooking:
- Preheat your oven to 375°F. Place the prepared rolls seam side down in a lightly oiled baking dish, arranging them with space between each roll. Bake for 25-30 minutes, until the internal temperature reaches 165°F and the exterior is golden brown and crispy.
- Rest and Serve:
- Allow the cooked rollatini to rest for 5 minutes before carefully removing all toothpicks. This resting period lets the juices redistribute throughout the chicken. Slice each roll on a diagonal to showcase the beautiful spiral of filling, and garnish with fresh parsley and extra parmesan.
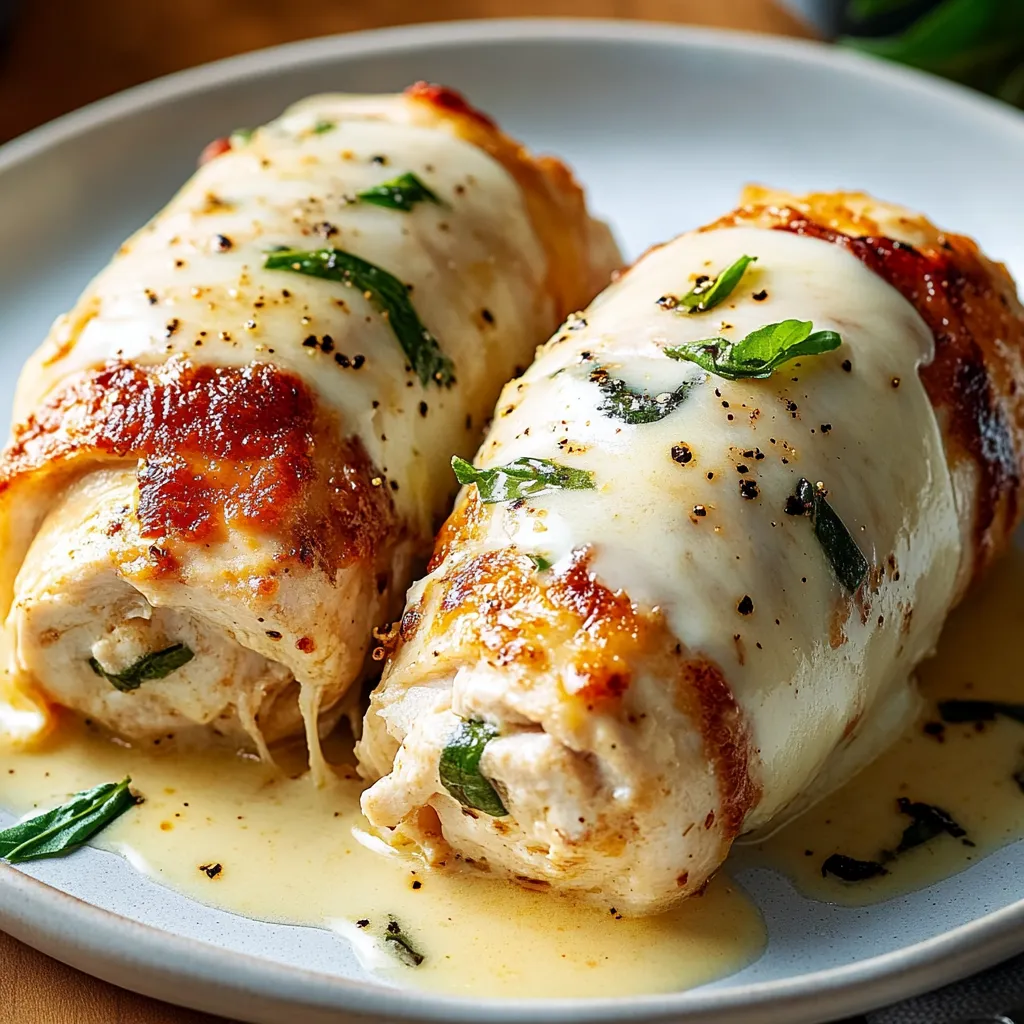
The three-cheese filling is truly what makes this dish special. My grandmother taught me that the key to perfect rollatini is getting the cheese ratio right—too much mozzarella makes it stringy, too much ricotta makes it bland. This recipe strikes the perfect balance.
Make-Ahead Tips
You can prepare these rollatini completely up to the breading stage, then refrigerate them covered for up to 24 hours. Just let them sit at room temperature for 15 minutes before baking. For longer storage, freeze the uncooked breaded rolls on a baking sheet until solid, then transfer to a freezer bag. When ready to cook, bake from frozen, adding about 10-15 minutes to the cooking time.
Flavorful Variations
The basic rollatini recipe is wonderfully adaptable. Try switching the filling to prosciutto and provolone for a saltier profile, or add sun-dried tomatoes and basil for a Mediterranean twist. For a heartier version, incorporate cooked and crumbled Italian sausage into the cheese mixture. You can also experiment with different breadings like panko mixed with grated parmesan for extra crunch.
Serving Suggestions
While these chicken rollatini are delicious on their own, they pair beautifully with complementary sides. Serve them over a bed of angel hair pasta tossed with olive oil and herbs, or alongside roasted garlic mashed potatoes to soak up the juices. For a lighter option, offer a crisp arugula salad dressed with lemon vinaigrette to balance the richness of the dish. A side of simple marinara sauce for dipping adds wonderful acidity.
Troubleshooting Common Issues
If your rollatini are unrolling during cooking, you likely need more toothpicks or they're not inserted properly. Place them perpendicular to the seam for best results. If the breading is getting soggy rather than crispy, make sure your oven is fully preheated and consider placing the rollatini on a wire rack inside your baking sheet to allow air circulation. For chicken that seems dry, you may have overcooked it—invest in an instant-read thermometer to check for doneness at exactly 165°F.
Recipe FAQs
- → What's the best way to pound chicken breasts evenly?
Place chicken breasts between two sheets of plastic wrap before pounding to prevent splattering. Use the flat side of a meat mallet and work from the center outward with gentle, even strokes. Aim for consistent ¼-inch thickness across the entire breast for even cooking. If you don't have a meat mallet, a heavy-bottomed pan works well as an alternative.
- → Can I prepare chicken rollatini ahead of time?
Yes! You can assemble the rollatini up to 24 hours in advance. Prepare them through the breadcrumb coating step, then cover tightly and refrigerate. Remove from the refrigerator about 20 minutes before cooking to allow them to come closer to room temperature for more even cooking. You can also freeze the assembled, uncooked rollatini for up to a month—just thaw overnight in the refrigerator before cooking.
- → What are good substitutes for the cheese filling?
The cheese filling is highly adaptable. Try goat cheese or feta for tanginess, provolone for a smoky flavor, or dairy-free alternatives for lactose intolerance. Beyond cheese, consider adding sun-dried tomatoes, roasted red peppers, sautéed mushrooms, fresh herbs like basil or tarragon, or prosciutto for extra flavor. Just be careful not to overfill, as this can make rolling difficult.
- → Why is my chicken rollatini leaking filling during cooking?
Leaking filling usually occurs when the rolls aren't secured properly or are overfilled. Ensure you leave a small border (about ½-inch) around the edges when adding filling. Roll the chicken tightly and secure with multiple toothpicks placed perpendicular to the seam. Additionally, make sure your filling isn't too wet—drain spinach thoroughly after cooking and use thicker cheese mixtures rather than runny ones.
- → What sauces pair well with chicken rollatini?
Chicken rollatini pairs beautifully with several sauces. Traditional marinara offers a classic Italian pairing, while creamy Alfredo sauce provides richness. A light lemon butter sauce adds brightness, and pesto brings herbaceous flavor. For something different, try a sun-dried tomato cream sauce or a simple white wine reduction. Serve the sauce beneath or drizzled over the rollatini, allowing the crispy exterior to remain intact.
- → How do I know when my chicken rollatini is fully cooked?
The most reliable way to check doneness is using an instant-read thermometer, which should register 165°F (74°C) when inserted into the thickest part of the roll. Visually, the breadcrumb coating should be golden brown, and when cut, the chicken should be white throughout with no pink. The cheese filling should be melted and hot. If cooking larger rolls, you may need to extend your cooking time slightly.