
 Save
Save
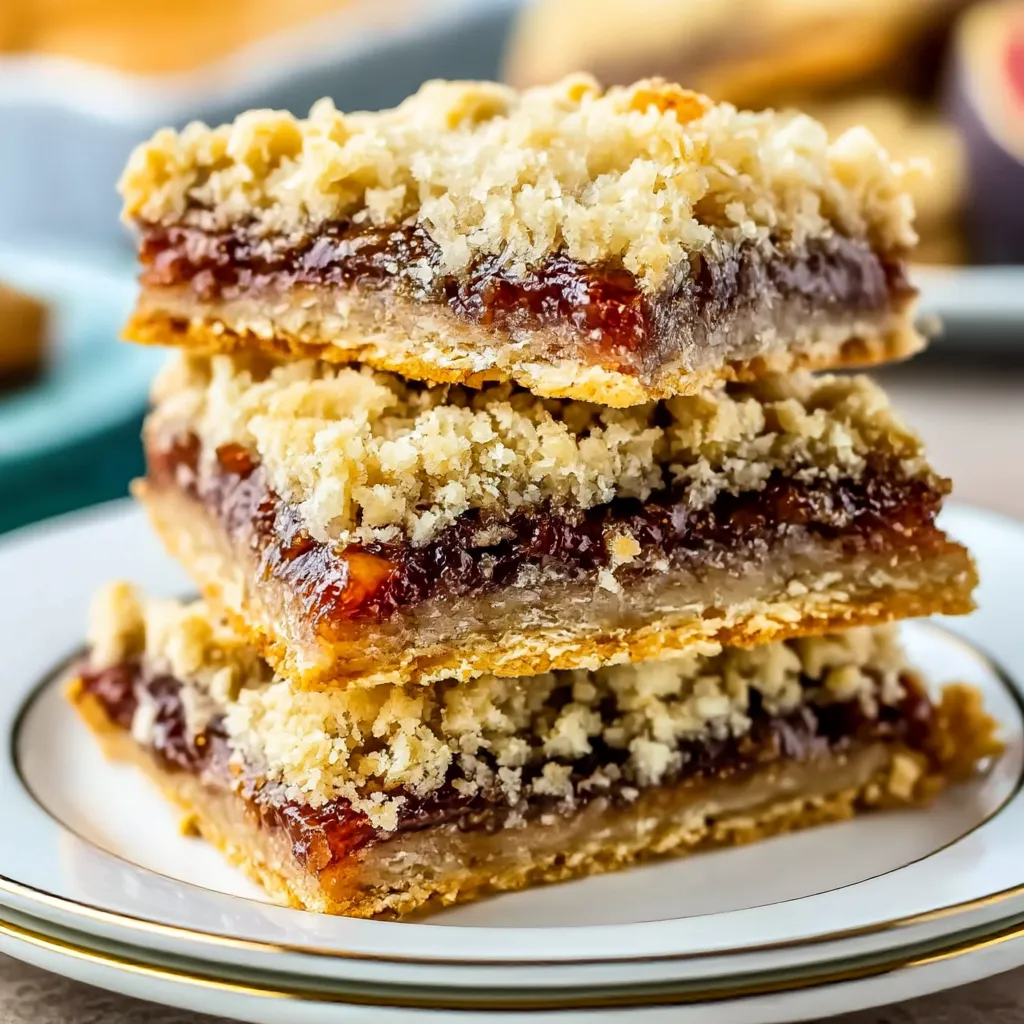
This homemade fig bar recipe transforms fresh figs into delectable treats that balance sweet jammy filling with a buttery oatmeal crust. These bars perfectly capture the essence of fresh figs in a portable, crowd-pleasing dessert that's more flavorful than any store-bought version.
I first made these bars during late summer when my neighbor's fig tree was overflowing with fruit. The kitchen filled with the most incredible aroma while baking, and they've since become my signature dessert for gatherings.
Ingredients
For the Fig Filling
- Small to medium fresh figs: provide natural sweetness and that distinctive fig flavor
- Brown sugar: enhances the caramel notes of the figs and helps thicken the filling
- Lemon zest: adds brightness that balances the sweetness
- Kosher salt: heightens all the flavors
- Vanilla extract: adds depth and warmth to the jam mixture
For the Oatmeal Crust
- Melted butter: creates a rich base and helps bind the ingredients
- All purpose flour: provides structure while keeping the bars tender
- Old fashioned rolled oats: add wonderful texture and a nutty flavor
- Brown sugar: contributes moisture and caramel notes
- Salt: balances the sweetness
- Baking powder: gives a slight lift to the crust
- Vanilla extract: rounds out the flavor profile
Step-by-Step Instructions
Prepare the Fig Filling
- Cook:
- Quartered figs with brown sugar, lemon zest, salt, and vanilla in a medium saucepan over medium heat until the figs release their juices and begin to boil. Reduce heat and simmer for a full 45 minutes, stirring occasionally and breaking up larger pieces with your spoon. The slow cooking concentrates the flavors and creates a thick, spreadable consistency. Cool completely before using, and for a smoother texture, puree with an immersion blender or food processor.
Make the Oatmeal Crust
- Melt butter:
- In a large microwave safe bowl until completely liquid. Add flour, oats, brown sugar, salt, baking powder, and vanilla directly to the melted butter. Mix thoroughly until no dry spots remain. The mixture will be thick and somewhat crumbly. I find using clean hands works best to ensure everything is evenly incorporated without overworking the dough.
Assemble the Bars
- Reserve:
- 1½ cups of the oat mixture for the topping. Press the remaining mixture firmly into your prepared pan, using the bottom of a glass to create an even layer. This firm pressing prevents a crumbly bottom crust. Spread the cooled fig filling in an even layer over the crust, making sure to reach the edges. Crumble the reserved oat mixture over the filling, allowing some of the filling to peek through.
Bake to Perfection
- Bake:
- In a preheated 350°F oven for 30 to 35 minutes. You'll know they're done when the fig filling bubbles around the edges and the crumble topping turns golden brown. Cool completely in the pan before lifting out using the foil handles and cutting into bars. Patience is key here as cutting while warm will result in messy bars.
 Save
Save
When I serve these at gatherings, I always get asked for the recipe. The unique combination of textures with the chewy oat crust and jammy fig center creates something truly special. My mother, who claims not to like figs, has been known to sneak seconds when she thinks nobody is looking.
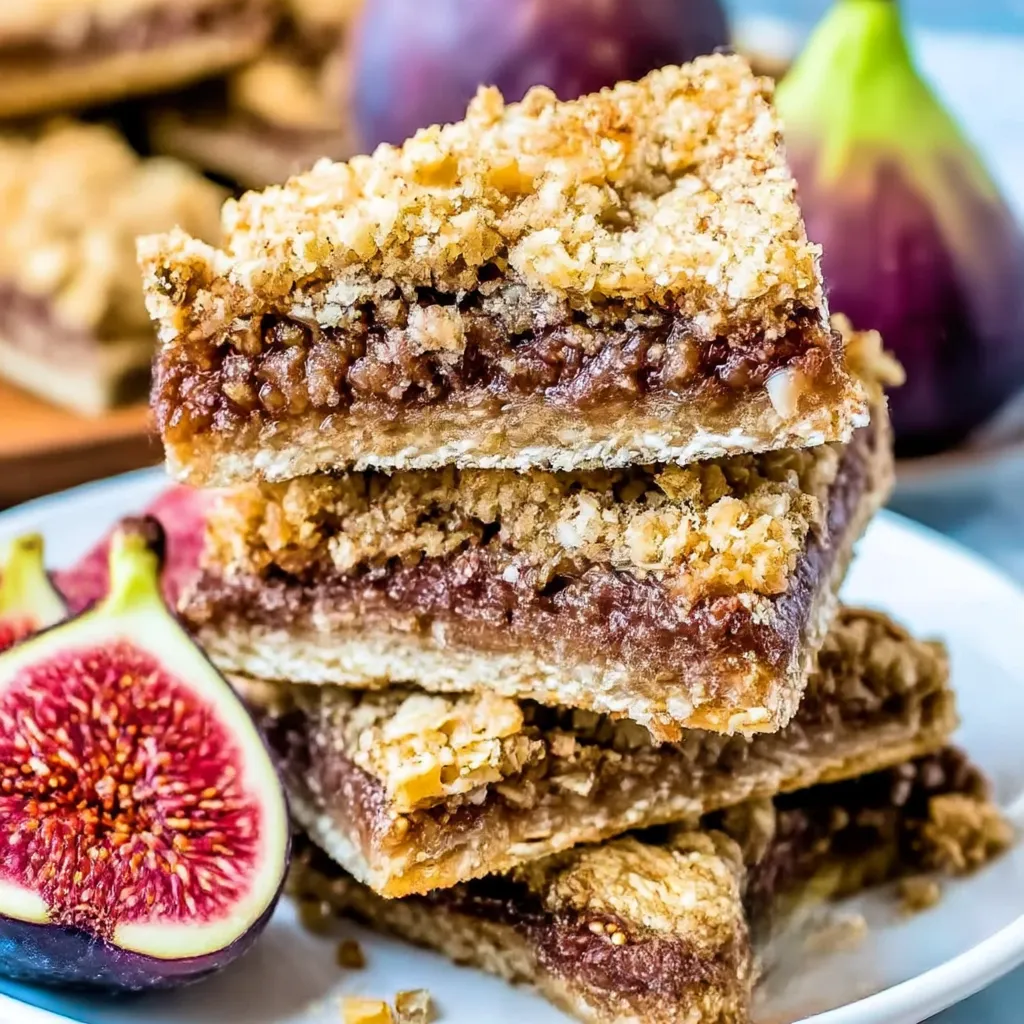
Selecting the Perfect Figs
Fresh figs are delicate fruits with a short shelf life. Look for figs that yield slightly to pressure but aren't mushy. They should smell sweet and have no signs of mold. The best figs for this recipe are those that are fully ripe but not overripe. If your figs are particularly juicy, you may need to cook the filling slightly longer to achieve the right consistency.
Making These Bars Year-Round
When fresh figs aren't available, these bars can still be a year-round treat. Store-bought fig jam works perfectly as a substitute for homemade filling. You'll need about 2 cups of jam to fill the bars. For a different twist, try mixing fig jam with other fruit preserves like raspberry or apricot for unique flavor combinations. I particularly love adding a tablespoon of orange liqueur to the store-bought jam to brighten the flavors.
Serving Suggestions
These fig bars are versatile enough to serve in multiple settings. For an elevated dessert, warm a bar slightly and serve with a scoop of vanilla ice cream or a dollop of mascarpone cheese. For afternoon tea, cut the bars into smaller squares and dust with powdered sugar. They also make an excellent addition to cheese boards alongside manchego or goat cheese, creating a sweet counterpoint to savory elements.
Recipe FAQs
- → Can I use dried figs instead of fresh figs?
Yes, you can substitute dried figs for fresh figs. Soak about 2 cups of dried figs in hot water for 30 minutes until softened, then drain and proceed with the recipe. You may need to add 2-3 tablespoons of water when cooking to achieve the right consistency.
- → Why are my fig bars too crumbly?
Crumbly fig bars typically result from either too much flour in the crust or not pressing the bottom layer firmly enough. Make sure to measure flour correctly and use the bottom of a glass to compact the base layer firmly before adding the filling.
- → Can I use quick oats instead of old-fashioned oats?
It's not recommended to substitute quick oats for old-fashioned rolled oats in this recipe. Quick oats have a finer texture that will change the structure and mouthfeel of the crust, making it less satisfying and potentially gummy.
- → How do I know when the fig filling is cooked enough?
The fig filling is ready when it has thickened considerably and most of the liquid has evaporated. When you drag a spoon through the mixture, it should leave a clear path that slowly fills in. The mixture should have a jam-like consistency.
- → Can I make these fig bars ahead of time for a party?
Absolutely! These fig bars are perfect for make-ahead preparation. You can bake them 1-2 days before your event and store at room temperature in an airtight container. For the freshest taste, you can also freeze them up to 3 months ahead and thaw overnight in the refrigerator.
- → What's the best way to cut clean squares?
For the cleanest cuts, make sure the bars are completely cooled before slicing. Use a sharp knife and wipe the blade clean between cuts. Chilling the bars in the refrigerator for an hour before cutting can also help achieve neater squares.