
 Save
Save
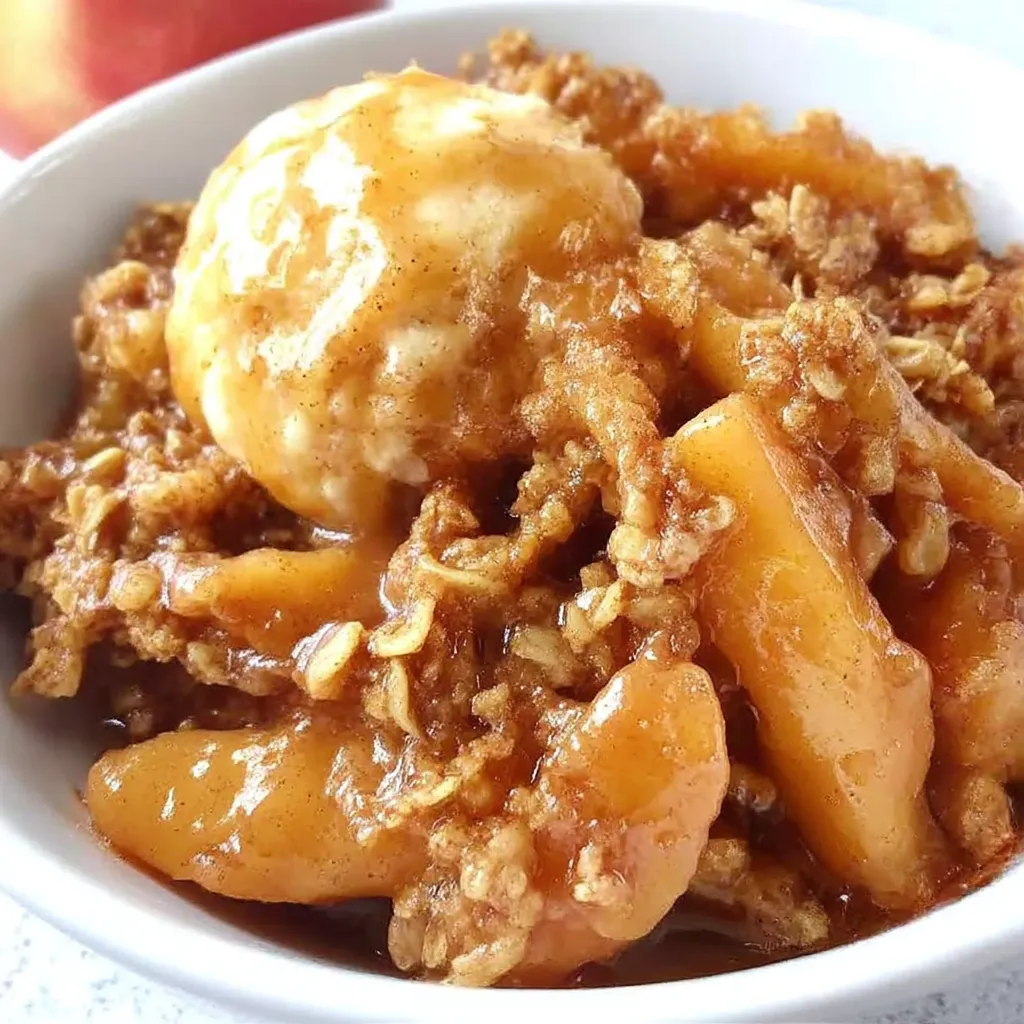
This cozy apple crisp recipe transforms simple ingredients into a warm, comforting dessert that fills your home with the sweet aroma of cinnamon and baked apples. The contrast between the tender fruit and crispy oat topping creates the perfect balance of textures in every spoonful.
I first made this apple crisp when my son requested something sweet but not too complicated after dinner. The look on his face when that first scoop of warm apple crisp with melting ice cream hit his plate convinced me this needed to become our family's go-to comfort dessert.
Ingredients
- Fresh apples: choose firm varieties like Granny Smith, Honeycrisp, or Braeburn for the best texture and flavor when baked
- Granulated sugar: balances the tartness of the apples without overpowering their natural sweetness
- Cinnamon: provides that classic warm spice that pairs perfectly with apples
- Vanilla extract: enhances all the flavors and adds depth to the filling
- All-purpose flour: creates structure in the crumbly topping
- Old-fashioned oats: adds wonderful texture and a rustic quality to the crisp
- Brown sugar: contributes a rich molasses flavor that white sugar simply cannot match
- Salt: enhances all the other flavors and balances the sweetness
- Butter: brings the topping together and helps it become golden and crispy in the oven
Step-by-Step Instructions
- Prepare Your Baking Dish:
- Start by preheating your oven to 350 degrees Fahrenheit. Take a deep dish pie plate or large baking dish and thoroughly coat it with butter or cooking spray. This prevents sticking and makes serving much easier later.
- Create The Apple Filling:
- In a large bowl, combine your evenly sliced apples with the granulated sugar, cinnamon, and vanilla extract. Toss everything together until each apple slice is coated with the sweet, spiced mixture. This ensures consistent flavor throughout the dessert. Pour the coated apples into your prepared baking dish, spreading them into an even layer.
- Mix The Crumble Topping:
- In a separate medium bowl, whisk together the flour, oats, brown sugar, salt, and cinnamon until well combined. Pour the melted butter over these dry ingredients and stir until the mixture becomes crumbly and moist with no dry spots remaining. The texture should resemble wet sand that clumps together when squeezed.
- Assemble And Bake:
- Sprinkle the crumb mixture evenly over the apples, making sure to cover the entire surface. Avoid the temptation to press the topping down as this will prevent it from becoming crispy. Bake in your preheated oven for 45 to 60 minutes until you can see the apple filling bubbling around the edges and the topping has turned a beautiful golden brown color.
- Rest And Serve:
- Allow your apple crisp to cool for about 10 minutes before serving. This brief resting period helps the filling set slightly while still keeping everything warm. Serve each portion with a scoop of vanilla ice cream for the ultimate experience.
 Save
Save
My absolute favorite part of this recipe is watching the magical transformation of the oat topping as it bakes. It starts as a loose crumbly mixture but emerges from the oven as a beautifully textured crispy blanket that perfectly complements the tender apples beneath. Every time I make this my kitchen fills with an aroma that instantly makes everyone feel at home.
Apple Varieties Matter
The type of apple you choose significantly impacts the final result of your crisp. For a balanced flavor, choose a combination of sweet and tart apples. Granny Smith provides tartness and holds its shape well during baking, while Honeycrisp adds sweetness and a juicy texture. Avoid Red Delicious, which tend to become mushy when cooked. I personally love using Braeburn apples when available as they offer the perfect balance of sweetness, acidity, and structural integrity through the baking process.
Make-Ahead Options
This apple crisp is incredibly accommodating for busy schedules. You can prepare the entire dish up to 24 hours in advance, keep it covered in the refrigerator, and bake when needed. For longer storage, assemble the crisp, freeze it unbaked for up to 3 months, then bake directly from frozen, adding about 15 minutes to the baking time. The topping can also be made separately and stored in the refrigerator for up to a week or frozen for 3 months, perfect for when you want a quick dessert without much prep.
Seasonal Variations
While this recipe shines with apples, you can adapt it throughout the year using seasonal fruits. In summer, substitute peaches, berries, or cherries for the apples, adjusting the sugar to account for the natural sweetness of the fruit. Fall brings opportunities for pear and apple combinations or adding cranberries for tartness. Winter versions work beautifully with frozen fruits or even poached quince for something special. The versatile topping remains the same, making this recipe a year-round favorite that never feels repetitive.
Serving Suggestions
Transform this simple dessert into an impressive finale by creating a dessert bar. Serve the warm crisp alongside options like vanilla bean ice cream, fresh whipped cream, caramel sauce, toasted nuts, and even a splash of bourbon for the adults. For breakfast, repurpose leftover crisp by layering it with Greek yogurt and a drizzle of honey. As a special treat, use the crisp as a filling for crepes topped with a dollop of mascarpone cheese. The versatility of this dessert extends well beyond the traditional bowl and spoon approach.
Recipe FAQs
- → What type of apples work best for apple crisp?
Firm, tart apples like Granny Smith, Honeycrisp, or Braeburn work exceptionally well as they hold their shape during baking and provide a nice contrast to the sweet topping. You can also use a mix of sweet and tart varieties for complex flavor. Avoid softer apples like Red Delicious which can become mushy when baked.
- → Can I make apple crisp ahead of time?
Yes, you can prepare apple crisp up to 24 hours in advance. Assemble the dessert, cover with plastic wrap, and refrigerate until ready to bake. You may need to add 5-10 minutes to the baking time if baking straight from the refrigerator. Alternatively, bake it completely, cool, and reheat at 350°F for 15 minutes before serving.
- → How do I store leftover apple crisp?
Cover leftover apple crisp with plastic wrap or transfer to an airtight container and refrigerate for up to 4-5 days. Reheat individual portions in the microwave for 30-45 seconds or place the entire dish in a 350°F oven for about 15 minutes until warmed through. The topping may lose some crispness after refrigeration.
- → Can I freeze apple crisp?
Yes, apple crisp freezes well for up to 3 months. For best results, freeze it unbaked: assemble in a freezer-safe dish, cover tightly with foil and plastic wrap, then freeze. When ready to bake, thaw overnight in the refrigerator and bake as directed, adding 10-15 minutes to the baking time. Already baked crisp can also be frozen, but the topping may become less crisp upon thawing.
- → How can I tell when my apple crisp is done?
Your apple crisp is done when the topping is golden brown and the apple filling is bubbling around the edges. You can also test the apples by inserting a knife or skewer into the center - it should slide through the apples easily with little resistance, indicating they're tender. If the topping browns too quickly before the apples are soft, cover loosely with aluminum foil and continue baking.
- → Can I use quick oats instead of old-fashioned oats?
While old-fashioned (rolled) oats are preferred for their texture and chewiness, quick oats will work in a pinch. The texture of the topping will be slightly less defined and may become more cookie-like rather than crumbly. Steel-cut oats are not recommended as they remain too hard and chewy even after baking.