
 Save
Save
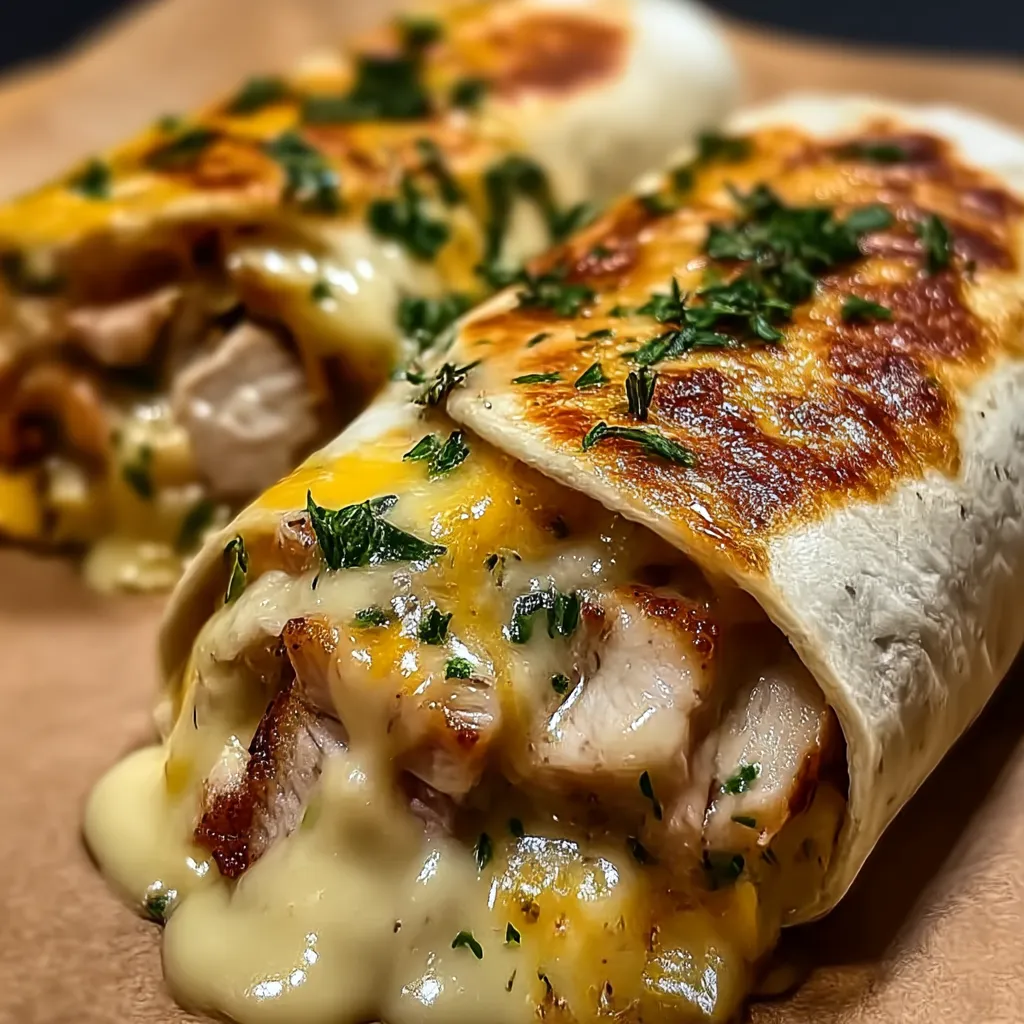
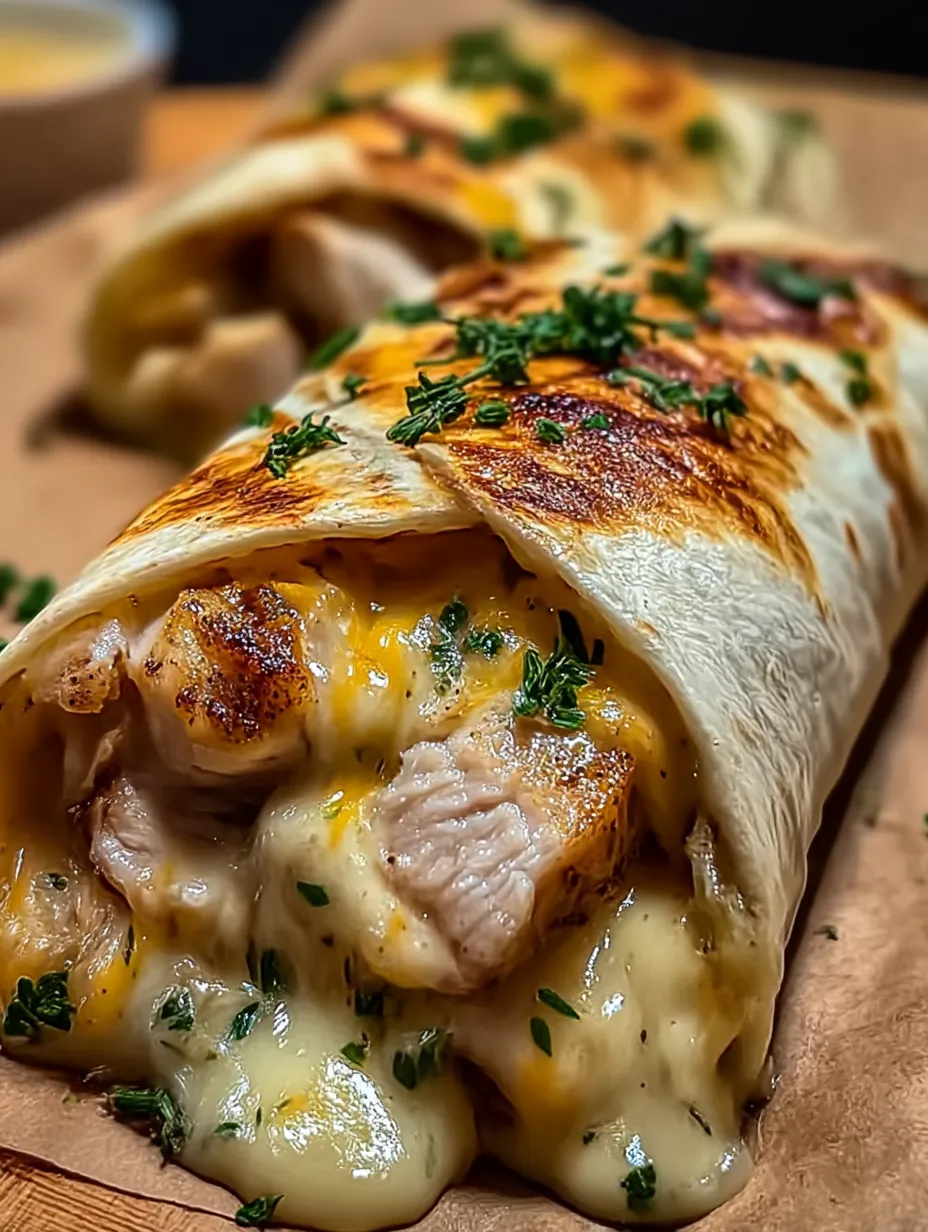
This cheesy garlic chicken wrap recipe transforms leftover chicken into a mouthwatering meal that's perfect for busy weeknights. The combination of melted mozzarella and cream cheese creates an irresistible gooey texture, while fresh garlic and parsley elevate the flavors to restaurant quality.
I created this recipe when my teenager needed a quick dinner before rushing to basketball practice. Now these wraps have become our go-to solution whenever we need a satisfying meal without much fuss.
Ingredients
- Cooked chicken: Provides the protein foundation. Use rotisserie chicken for the best flavor and convenience
- Mozzarella cheese: Creates that perfect stretchy texture everyone loves
- Cream cheese: Adds richness and binds everything together. Let it soften first for easier mixing
- Fresh garlic: Brings essential aromatic flavor. Dont substitute with powder if possible
- Fresh parsley: Brightens the entire dish with color and fresh flavor
- Large tortillas: Work best for proper wrapping. Choose the burrito size for best results
- Olive oil: Helps achieve that perfect golden crust when cooking
- Salt and pepper: Let you adjust seasoning to your preference
Step-by-Step Instructions
- Prepare the filling:
- Mix shredded chicken with mozzarella cheese, softened cream cheese, minced garlic, and chopped parsley until well combined. The warmth from the chicken will help melt the cheeses slightly, making mixing easier. Make sure the ingredients are evenly distributed for consistent flavor in every bite.
- Season the mixture:
- Add salt and pepper according to your taste preferences. The amount of salt needed depends on how seasoned your chicken was initially. Start with less and add more if needed after tasting.
- Assemble the wraps:
- Lay each tortilla flat on a clean surface and place an equal portion of the chicken mixture in the center, spreading it into a rectangular shape but leaving about an inch of space around the edges for proper folding.
- Roll the wraps:
- Fold in the sides of each tortilla, then roll from the bottom up, tucking in the sides as you go to create a secure wrap. Press lightly to seal the wrap shut.
- Cook the wraps:
- Heat olive oil in a skillet over medium heat until shimmering but not smoking. Place wraps seam-side down first to seal them closed, then cook for about 3-4 minutes until golden brown. Flip carefully and cook the other side until equally golden and the cheese inside has melted completely.
- Slice and serve:
- Remove wraps from the skillet and let rest for 1-2 minutes before slicing diagonally with a sharp knife. This brief rest allows the melted cheeses to set slightly so they dont immediately ooze out when cut.
 Save
Save
The garlic is truly the star ingredient here. I learned from my Italian grandmother to always use fresh garlic rather than pre-minced for maximum flavor. When the garlic hits the hot pan, the aroma that fills your kitchen will make everyone ask when dinner will be ready.
Make-Ahead Options
These wraps are perfect for meal planning. You can prepare the filling and store it separately from the tortillas for up to 3 days in the refrigerator. Assemble and cook when ready to eat. Alternatively, you can fully assemble the uncooked wraps, wrap them individually in plastic wrap, and refrigerate for up to 24 hours before cooking.
Ingredient Substitutions
If youre watching your calories, use light cream cheese and part-skim mozzarella without sacrificing too much flavor. For a dairy-free version, substitute the cheeses with dairy-free alternatives and add a tablespoon of nutritional yeast for that cheesy flavor. Turkey works beautifully in place of chicken, and for a vegetarian option, substitute the chicken with a mixture of sautéed mushrooms and spinach.
Serving Suggestions
These wraps pair wonderfully with a simple green salad dressed with lemon vinaigrette to cut through the richness. For a complete meal, serve with sweet potato fries or a cup of tomato soup for dipping. If serving for a party, cut into smaller pieces and provide various dipping sauces like ranch, marinara, or buffalo sauce to please different tastes.
Flavor Variations
You can easily adapt this recipe to create different flavor profiles. For a Mexican-inspired wrap, add taco seasoning, black beans, and corn to the filling. For an Italian version, include sun-dried tomatoes, basil instead of parsley, and a sprinkle of Italian seasoning. BBQ lovers can mix in some barbecue sauce with the chicken and add caramelized onions for a sweet and tangy twist.
Recipe FAQs
- → Can I prepare these chicken wraps ahead of time?
Yes! These wraps can be assembled ahead of time and stored in the refrigerator. When ready to eat, simply heat them in a skillet until golden brown and heated through, about 3-4 minutes per side.
- → What vegetables can I add to these wraps?
Spinach, bell peppers, sautéed onions, or diced tomatoes all work wonderfully. Just make sure any watery vegetables like tomatoes are well-drained to prevent soggy wraps.
- → Can I use rotisserie chicken for this dish?
Absolutely! Store-bought rotisserie chicken is a perfect time-saver for this dish. Simply shred the meat and proceed with the recipe as directed.
- → What are good dipping sauces to serve with these wraps?
Ranch dressing, marinara sauce, buffalo sauce, or a simple garlic aioli all complement these wraps beautifully. You could also try a sriracha mayo for a spicy kick.
- → Can I make these wraps gluten-free?
Yes, simply substitute the regular tortillas with your favorite gluten-free tortillas or wraps. The filling ingredients are naturally gluten-free, but always check packaging to be sure.
- → How do I prevent the wraps from opening while cooking?
Place the wraps seam-side down first when cooking. The heat will help seal the edge. You can also secure them with toothpicks before cooking, just remember to remove them before serving!