
 Save
Save
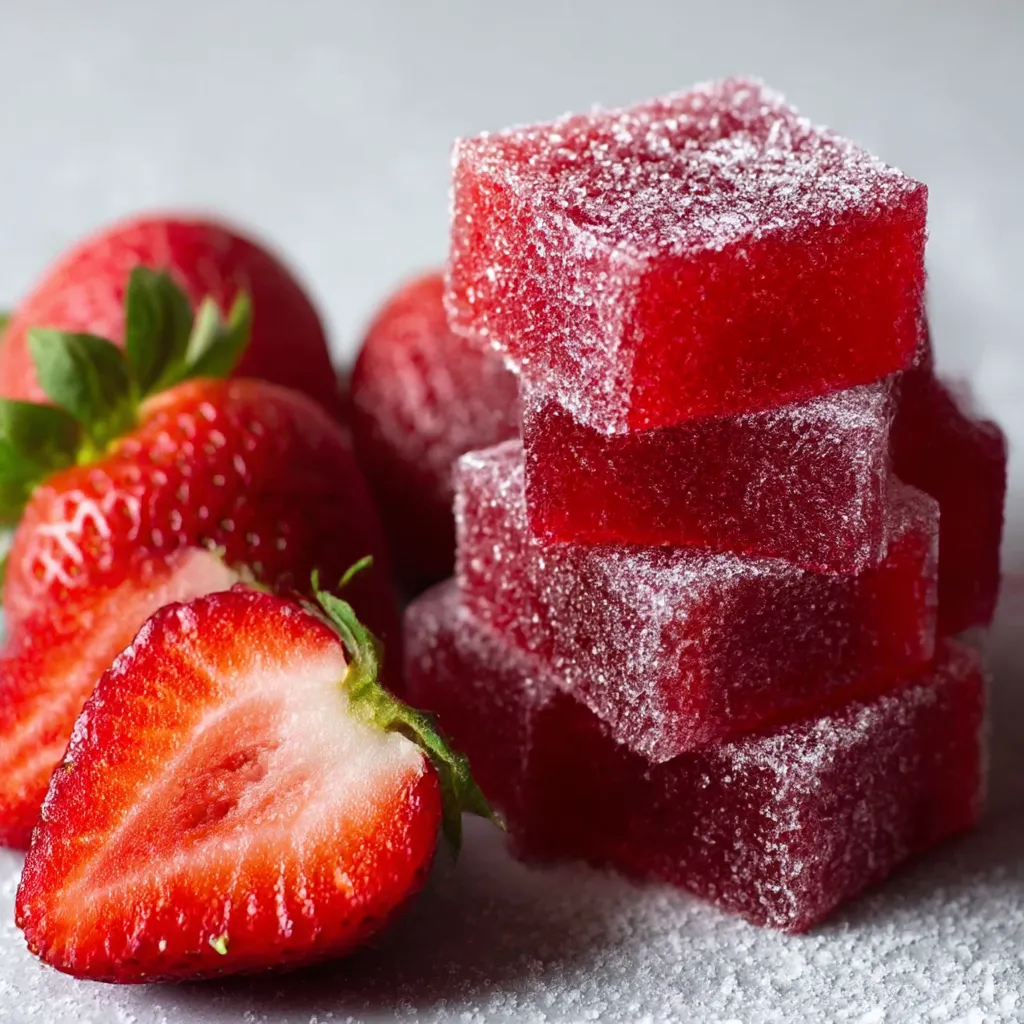
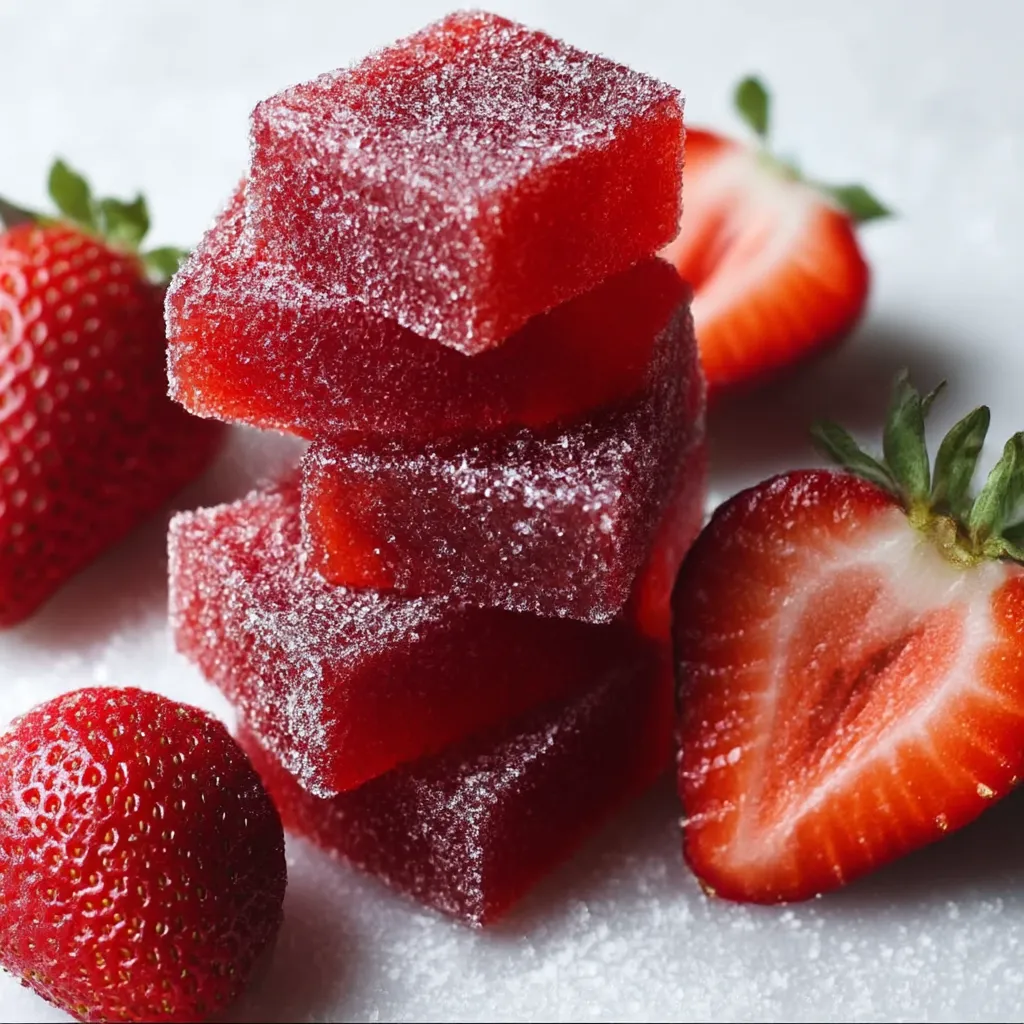
This vibrant homemade strawberry gummy candy transforms simple ingredients into irresistible sweet and sour treats. With bright berry flavor and the perfect chewy texture, these candies rival anything from the store but without artificial ingredients.
I first tried making these gummies during summer when my strawberry plants produced more berries than we could eat fresh. My children now request these candies for movie nights and birthday parties instead of store bought alternatives.
Ingredients
- Fresh or frozen strawberries form the flavor base these candies depend on. Select ripe, fragrant berries for best results.
- Granulated sugar is absolutely critical at the specified amount for proper setting and preservation.
- Corn syrup prevents crystallization and creates that ideal gummy texture.
- Regular fruit pectin gives these candies their distinctive chew without gelatin.
- Baking soda helps the pectin work properly with the fruit acids.
- Filtered water dilutes the pectin for even distribution.
- Citric acid provides that characteristic sour tang found in commercial gummies.
- Sour sugar coating combines regular sugar with additional citric acid for an extra pucker factor.
Step-by-Step Instructions
- Prepare molds:
- Set silicone molds on a cookie sheet on a heatproof surface before beginning. The hot candy mixture will damage countertops. Alternatively, line a 9×9 baking pan with parchment paper for cutting shapes later.
- Create strawberry base:
- Combine pureed strawberries, granulated sugar, and corn syrup in a medium heavy bottomed saucepan. Heat over medium to medium high until the mixture reaches a full boil, stirring occasionally to prevent scorching.
- Prepare pectin mixture:
- In a separate small saucepan, mix pectin, baking soda, and water. This combination will foam significantly. Heat until the foam subsides somewhat, then add this mixture to your boiling strawberry base.
- Cook to temperature:
- Continue cooking the combined mixture while monitoring with a candy thermometer. Patience is crucial here as it will take approximately 45 minutes to reach the target temperature of 230°F. Stir more frequently as the temperature climbs past 220°F.
- Add acid and mold:
- Once the mixture hits precisely 230°F, remove from heat and quickly stir in the dissolved citric acid solution. Immediately transfer to prepared molds. For easier pouring, use a spouted measuring cup. Work quickly as the mixture thickens rapidly as it cools.
- Cool and set:
- Allow the candies to cool completely at room temperature for at least two hours. Longer cooling creates firmer gummies. Overnight setting produces the best texture.
- Create sour coating:
- Whisk together granulated sugar and citric acid in a bowl until evenly distributed. This creates the characteristic sour coating that makes these candies so addictive.
- Coat and finish:
- Remove candies from molds and roll each piece in the sour sugar mixture until fully coated. The sugar coating not only adds flavor but prevents the gummies from sticking together during storage.
My favorite part of making these gummies is watching the vibrant red mixture transform into perfect chewy treats. The first time I made these for my nieces birthday party, the children kept coming back for more, completely ignoring the store bought options on the table.
Sugar Science
The sugar quantity in this recipe serves multiple critical functions beyond sweetness. First, it works with the pectin to create the proper gel structure. Additionally, sugar acts as a preservative that extends shelf life by binding water molecules that would otherwise support microbial growth. Finally, the high sugar concentration creates the characteristic chewy texture that makes gummies so satisfying. Attempts to reduce sugar will result in poor setting, shorter shelf life, and inferior texture.
Troubleshooting Tips
If your gummies turn out too soft, you likely didnt reach the target temperature of 230°F. Candy thermometer calibration is essential for success. Test your thermometer in boiling water it should read 212°F at sea level. If yours reads differently, adjust your target temperature accordingly.
For gummies that are too firm or rubbery, you may have cooked the mixture slightly beyond the target temperature. Even a few degrees can significantly impact the final texture. Watch carefully as the mixture approaches 230°F and remove from heat immediately upon reaching this point.
If your candies develop a grainy texture during storage, they were likely exposed to moisture or temperature fluctuations. Store in airtight containers separated by parchment paper to maintain optimal texture.
Flavor Variations
While strawberry creates classic red gummies, this recipe works beautifully with other fruits. Raspberry produces intensely flavored deep red candies, while blackberry creates sophisticated purple treats. For tropical variations, mango puree creates sunny yellow gummies with exotic flavor. Blueberry makes beautiful violet candies with subtle sweetness.
When using different fruits, account for natural sweetness and acidity. Very tart fruits like cranberries may need slightly more sugar, while exceptionally sweet fruits like ripe peaches might need additional acid for balance. Regardless of the fruit chosen, maintain the exact same cooking temperature and sugar proportion for proper setting.
 Save
Save
Recipe FAQs
- → Can I use frozen strawberries for these gummies?
Yes, frozen strawberries work perfectly as long as they're fully thawed and pureed. This makes it convenient to prepare these gummies year-round, regardless of strawberry season.
- → Why can't I reduce the sugar in this recipe?
The sugar is essential for proper setting and preservation. Reducing it will prevent the gummies from achieving the right texture and could lead to spoilage. The sugar works with the pectin to create the characteristic chewy consistency.
- → Can I substitute the citric acid with something else?
Yes, you can substitute the powdered citric acid with lemon juice as mentioned in the ingredients list (2 tablespoons of lemon juice instead of the citric acid solution). However, the sour coating will still require citric acid for the best flavor.
- → How long do these gummies stay fresh?
When stored properly, these homemade gummies last up to 1 week at room temperature, 2 weeks in the refrigerator (separated by parchment), or 3 months in the freezer. The sugar coating helps preserve them by drawing out moisture.
- → Why do my gummies need to reach exactly 230°F?
The 230°F temperature is the crucial setting point that ensures the perfect gummy texture. Below this temperature, they'll be too soft; above it, they may become too hard or chewy. Using a candy thermometer is essential for accuracy.
- → Can I use different fruit purees for this method?
Yes, this technique works with many fruit purees. Consider raspberries, blackberries, or peaches. Just ensure you maintain the same amount of puree (300g) to keep the sugar-pectin ratio balanced for proper setting.