
 Save
Save
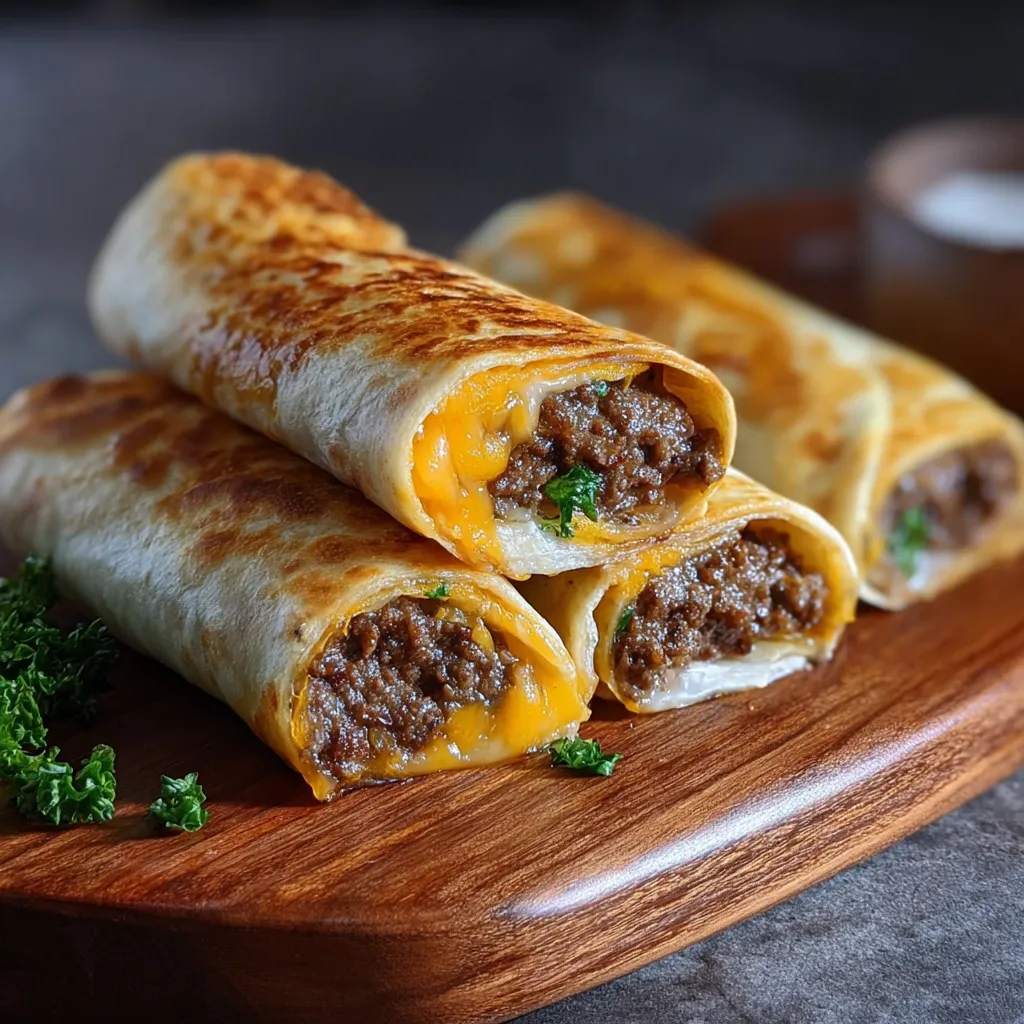
These garlic butter beef cheeseburger rollups have been my family's ultimate comfort food solution for busy weeknights, combining the flavors of a juicy cheeseburger with the convenience of a handheld meal. Perfect for game days, quick dinners, or when the kids are craving something fun yet satisfying.
I created these rollups when my son requested cheeseburgers but we were out of buns. The family loved them so much they now prefer these to regular burgers, especially my youngest who calls them "burger burritos."
Ingredients
- Ground beef: provides the classic burger flavor and hearty protein base. Look for 80/20 lean-to-fat ratio for the juiciest results
- Cheddar cheese: adds that sharp classic burger taste. Freshly shredded melts better than pre-packaged
- Mozzarella cheese: creates that perfect gooey stretch when you bite in. Use whole milk mozzarella for best meltability
- Flour tortillas: act as your burger "bun" in wrap form. Choose large 10-inch tortillas for easy rolling
- Butter: creates that golden crispy exterior. Use unsalted to control salt levels
- Fresh garlic: infuses the butter with aromatic flavor. Mince it very finely for even distribution
- Worcestershire sauce: brings umami depth to mimic that grilled burger taste. A little goes a long way
- Spices: like onion powder garlic powder and smoked paprika create that complete burger experience without needing actual onions
Step-by-Step Instructions
- Preheat the Oven:
- Begin by heating your oven to exactly 375°F. This moderate temperature ensures the tortillas get crispy without burning while giving the cheese inside enough time to melt perfectly. Line your baking sheet with parchment for easy cleanup and to prevent sticking.
- Cook the Beef:
- Heat your skillet until you can feel warmth hovering your hand above it before adding the olive oil. Once the oil shimmers slightly add your ground beef breaking it into small chunks immediately. Continue breaking it down as it cooks for even browning. Look for a nice caramelization on the meat pieces which indicates proper flavor development.
- Season the Beef:
- This is where the magic happens. Add your Worcestershire sauce while the beef is still hot so it sizzles and gets absorbed immediately. Sprinkle all your spices evenly over the meat rather than dumping them in one spot. Stir thoroughly making sure every bit of meat gets coated. The cooling period is crucial as it prevents the tortillas from getting soggy during assembly.
- Prepare the Garlic Butter:
- Melt your butter just until liquid but not hot enough to cook the garlic. Mix in your minced garlic while the butter is warm which helps release the aromatic oils without burning them. This mixture should be smooth and fragrant with visible specks of garlic throughout.
- Assemble the Rollups:
- Lay your tortillas on a flat clean surface with enough room to work. Spread approximately 1/4 cup of meat on each tortilla leaving a one-inch border on all sides. The meat should be warm but not hot. Sprinkle both cheeses evenly over the meat layer pressing down gently so they adhere.
- Roll and Bake:
- Start rolling from the bottom edge tucking in tightly as you go. Fold in the sides about halfway through the rolling process to prevent filling from escaping. Place each rollup seam-side down so they stay closed during baking. Brush generously with garlic butter covering the entire surface for maximum flavor and crispiness.
- Serve:
- Allow the rollups to rest for 3-5 minutes after removing from the oven. This helps the cheese set slightly so it doesn’t all ooze out when you cut them. Slice into 1-inch pinwheels using a sharp serrated knife for clean cuts. Arrange on a serving plate with pickle slices for that authentic burger experience.
 Save
Save
The Worcestershire sauce is my secret ingredient here. My grandmother taught me to add it to ground beef for that special something that makes people ask for your recipe. The first time I served these at my son’s baseball team dinner they disappeared within minutes and three moms texted me the next day asking how to make them.
Make-Ahead Options
These rollups can be completely assembled up to 24 hours before baking. Simply wrap tightly in plastic wrap and refrigerate. When ready to bake brush with the garlic butter right before putting them in the oven. This makes them perfect for entertaining when you want to prepare food in advance.
The cooked beef mixture also freezes beautifully for up to 3 months. I often double the meat portion of the recipe keep half in freezer containers and can pull together these rollups in just minutes on especially hectic weeknights.
Customization Ideas
Think of these rollups as a blank canvas for your favorite burger flavors. For a bacon cheeseburger version add crumbled cooked bacon to the beef mixture. Mushroom swiss lovers can sauté mushrooms until golden and substitute swiss for the cheddar.
For a spicy version add diced jalapeños and pepper jack cheese. My husband loves his with caramelized onions added to the beef mixture while my daughter prefers hers with a light spread of ketchup and mustard inside before rolling.
Serving Suggestions
While these rollups are satisfying on their own I like to serve them with simple sides that complement without competing. A crisp green salad balances the richness perfectly. For casual gatherings set out small bowls of traditional burger condiments like ketchup mustard and mayo for dipping.
For a complete meal experience serve with sweet potato fries or a light coleslaw. At parties I slice them into pinwheels and arrange on a platter with pickle spears small dishes of condiments and vegetable sticks for a fun interactive spread.
Recipe FAQs
- → Can I prepare these rollups ahead of time?
Yes! You can assemble the rollups up to 24 hours in advance and store them covered in the refrigerator. Brush with garlic butter just before baking. You may need to add 2-3 minutes to the baking time if cooking from cold.
- → What can I serve with these beef rollups?
These rollups pair well with a simple green salad, potato wedges, coleslaw, or a side of tomato soup. For dipping, consider offering ketchup, mustard, ranch dressing, or a spicy sriracha mayo.
- → Can I use a different type of cheese?
Absolutely! While cheddar and mozzarella provide a classic flavor and excellent melt, you can substitute with pepper jack for heat, Swiss for nuttiness, or any cheese that melts well. Blue cheese crumbles can also add a gourmet touch.
- → How do I store and reheat leftovers?
Store leftover rollups in an airtight container in the refrigerator for up to 3 days. Reheat in a 350°F oven for 8-10 minutes until warmed through, or in a microwave for 30-45 seconds per rollup. Avoid overheating to prevent the tortillas from becoming tough.
- → Can I make these rollups with ground turkey instead of beef?
Yes! Ground turkey is a great substitute for a leaner option. You might want to add a bit more Worcestershire sauce and seasonings as turkey can be milder in flavor than beef. Ground chicken, plant-based meat alternatives, or even seasoned black beans would also work well.
- → Can I freeze these beef rollups?
Yes, these freeze beautifully! Prepare them up to the baking step, then freeze on a baking sheet until solid. Transfer to a freezer bag and store for up to 3 months. Bake from frozen at 375°F for 20-25 minutes, or until heated through and golden.